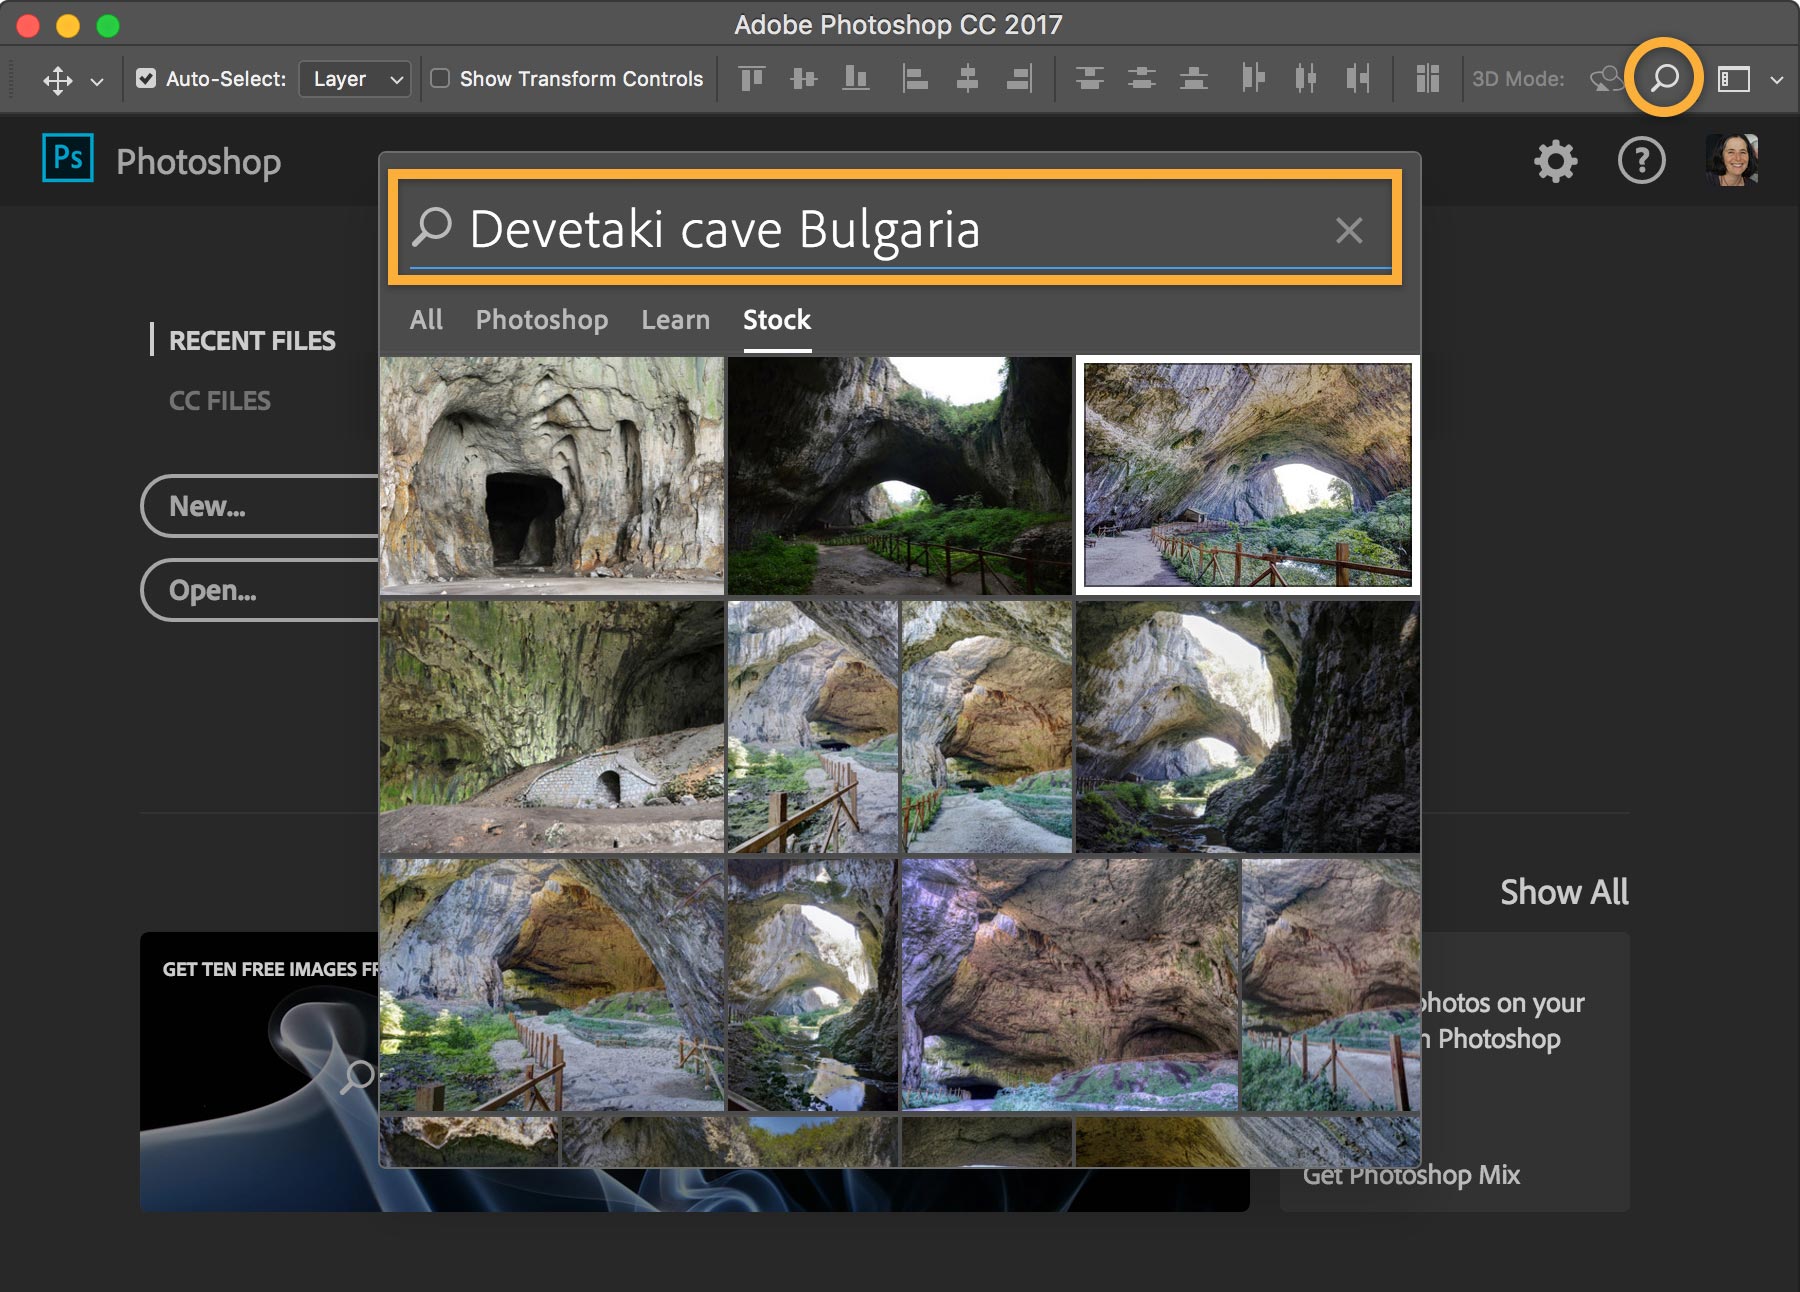
Open Photoshop and click the Search icon (magnifying glass). In the Search field, type a search term. Click the image you wish to use and the Libraries panel will open with a watermarked preview of the image.
Master these fundamental tools in Photoshop CC
Who says beginners can’t create cool design projects? Play with these features and you’ll be surprised how easy it is to use Adobe Photoshop CC.

What you'll need

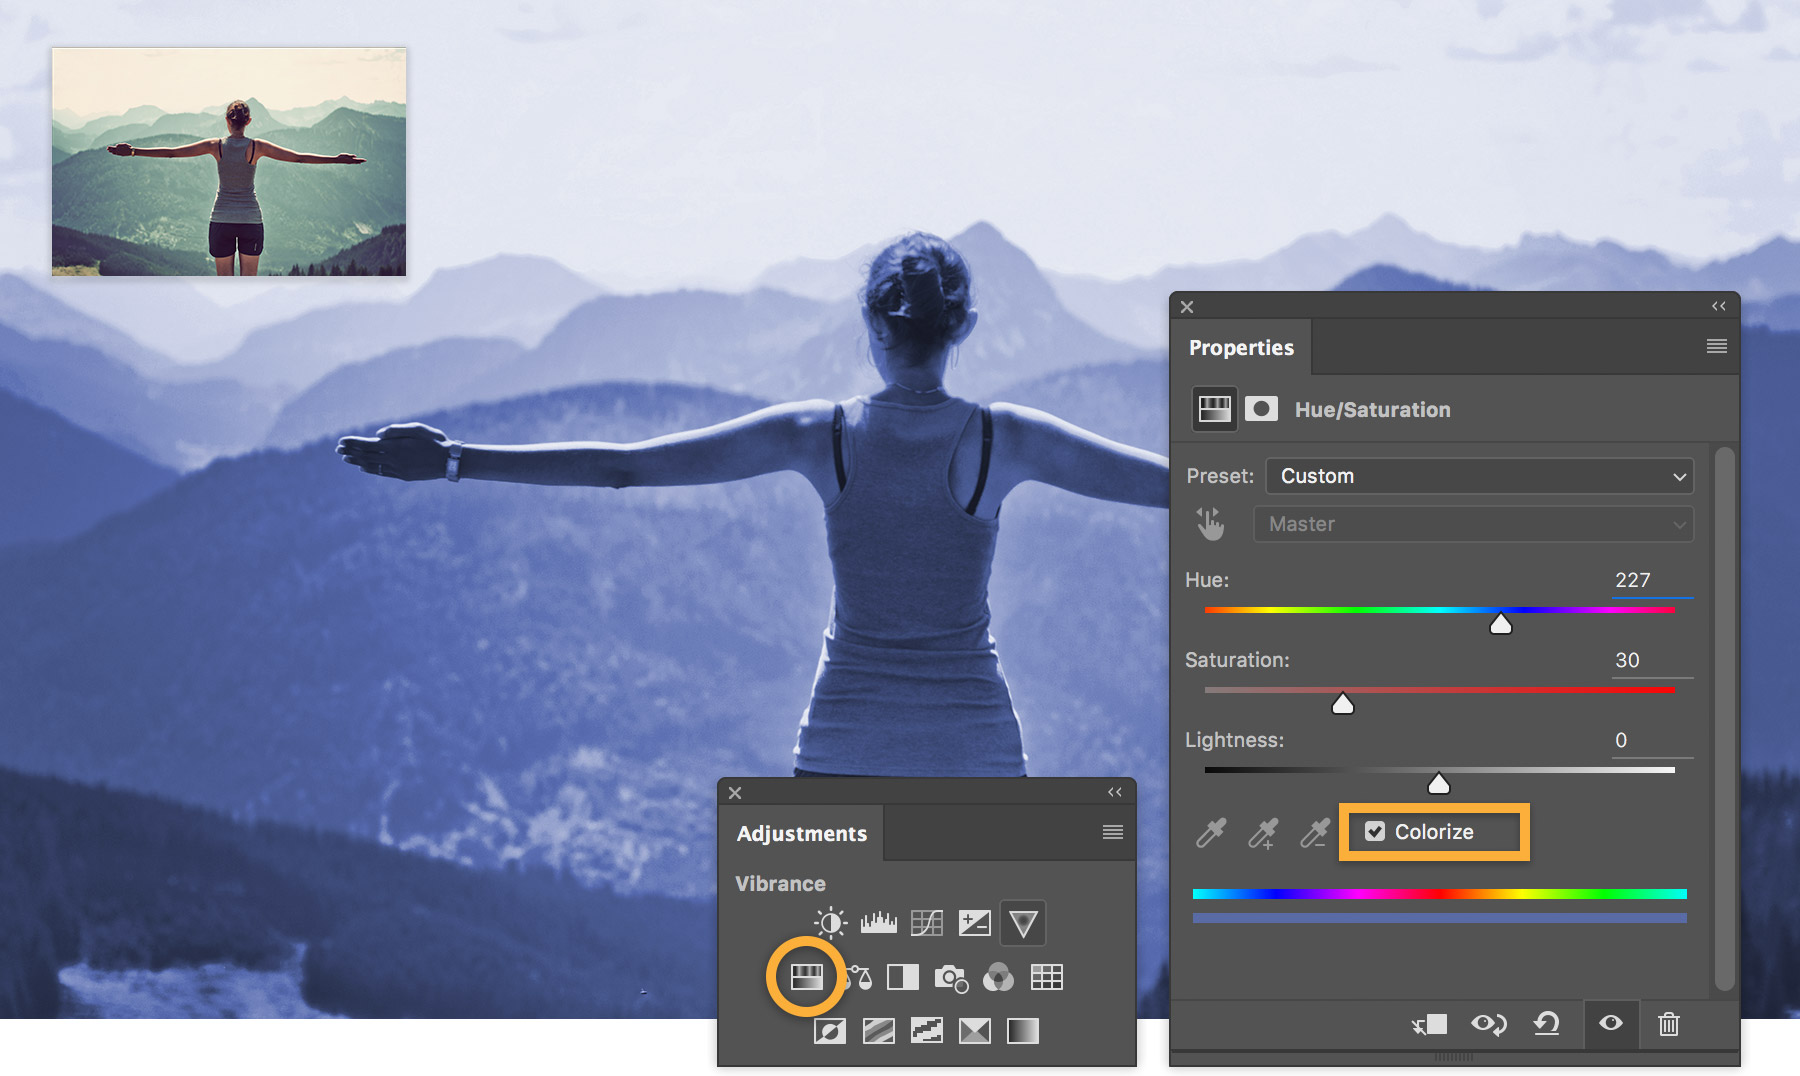
To change the feel of the original photo in the upper left corner, choose Window > Adjustments and select Hue/Saturation (circled).
In the Properties panel, adjust the values for Hue, Saturation, and Lightness, and then select Colorize to create a duotone-like, single color cast.
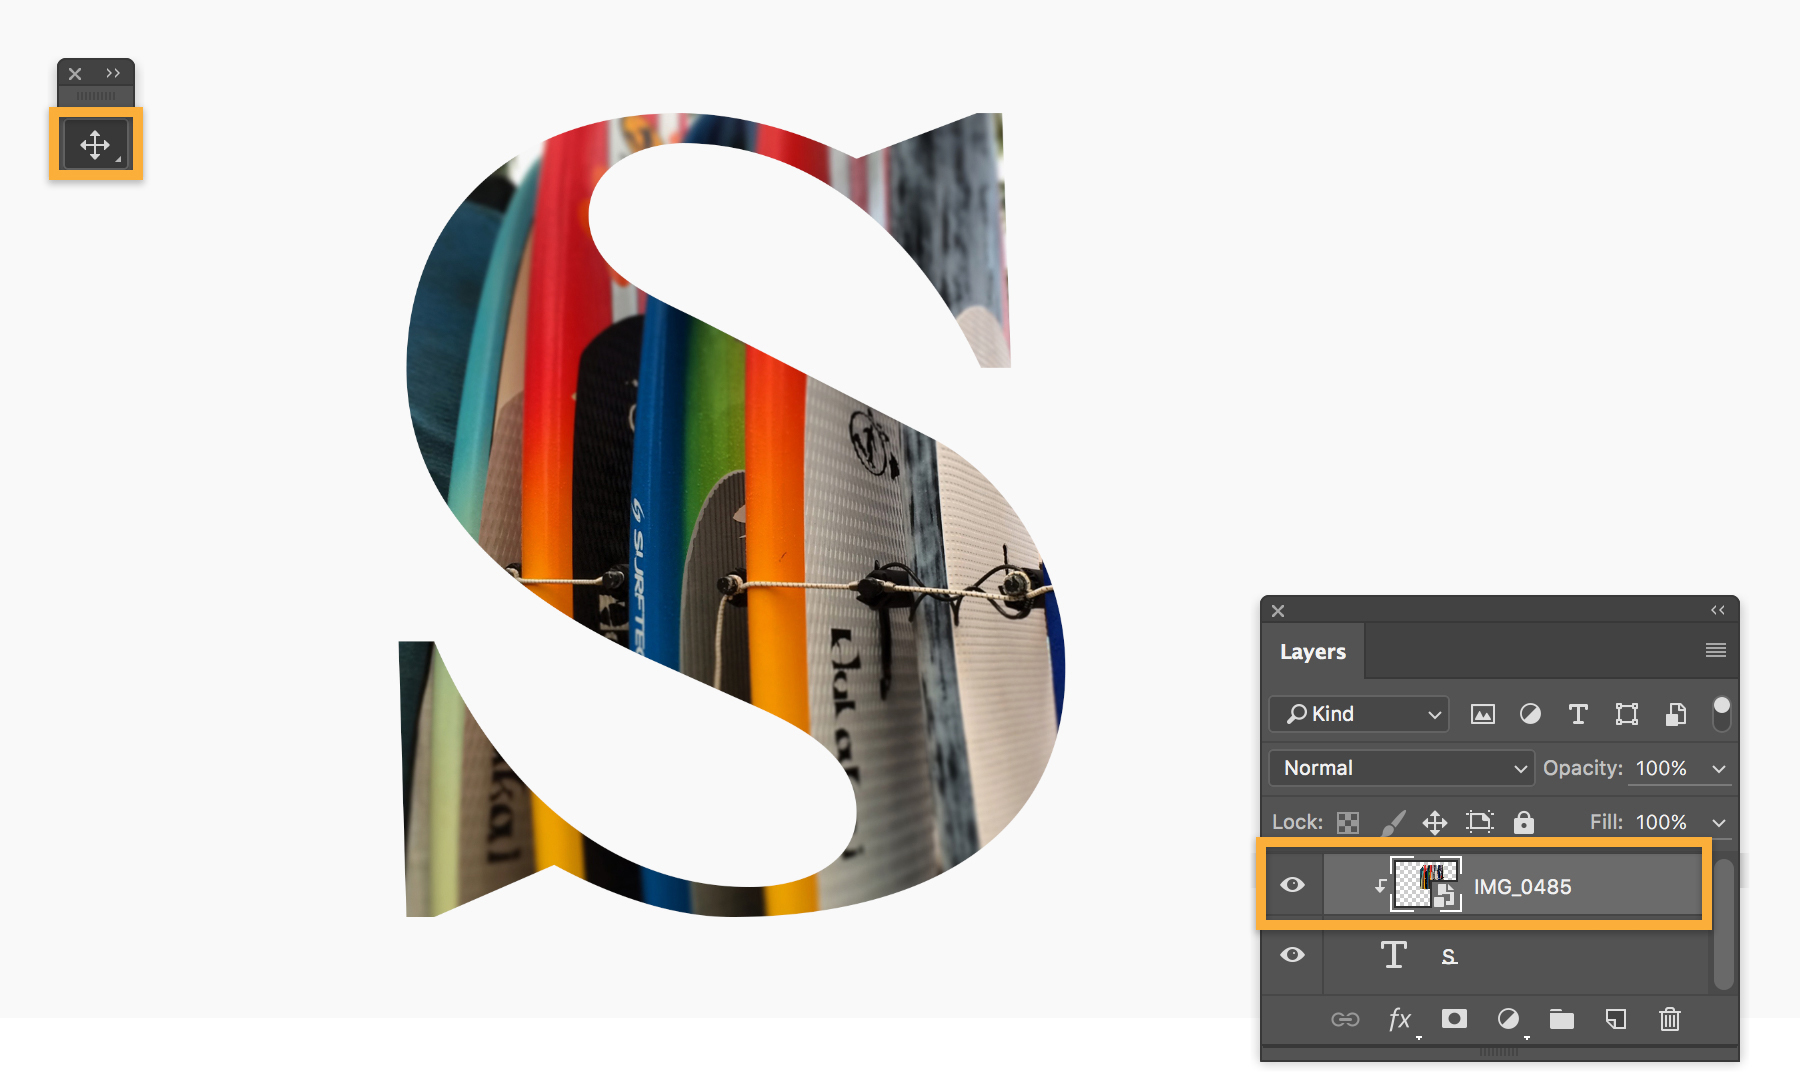
Create a new document. Select the Type tool and type a letter or word on the screen. We used Bodoni Poster at 400 pt.
Click anywhere on the canvas to place the type.

Drag an image from your computer or place an image from Adobe Stock over the entire letter.
Open the Layers panel (Window > Layers).

In the Layers panel, select the photo layer, and then choose Layer > Create Clipping Mask to clip your photograph to the type. With the image layer still selected, use the Move tool to move the image under the type until you get the ideal composition.

To follow along, download the two images located in the What you’ll need section at the top of this page.
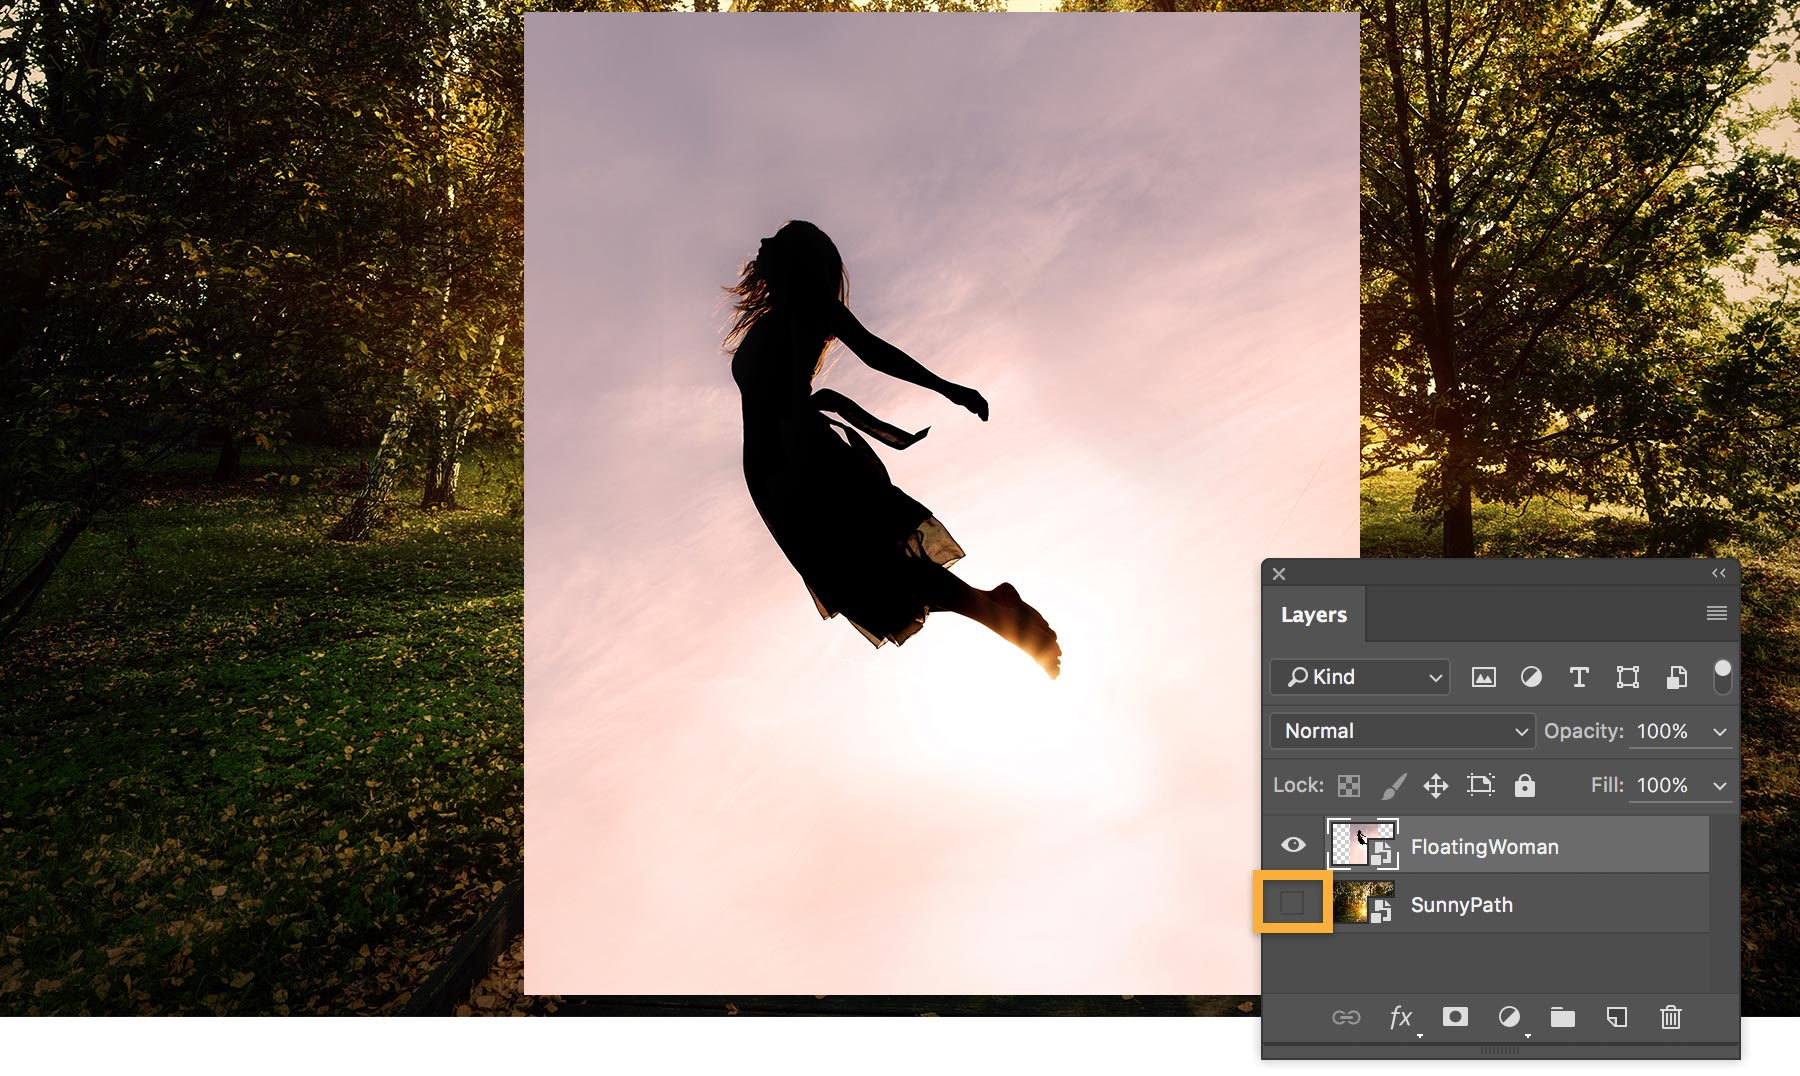
Open the SunnyPath image in Photoshop, and then add the FloatingWoman image, which will appear on a separate layer. If you’re not sure how to get two images on separate layers, see this super-quick tutorial on adding and arranging images.
Choose Window > Layers to open the Layers panel. Click the Eye icon to hide the SunnyPath image from view.
Choose Select > Select and Mask from the main menu.
Use the Quick Selection tool to select just the woman, without the background.
When you’re satisfied with the mask you’ve created, go over to the Properties panel and choose Output To: New Layer with Layer Mask. Click OK to return to the regular page view.

In the Layers panel, click the Eye icon to hide the original FloatingWoman layer, and reveal the SunnyPath layer.
With the Move tool selected, select the FloatingWoman layer with the layer mask that you just created, and position it so that the woman appears to be floating above the path.
Choose File > Save.

You love what you’ve created — now it’s time to share it with your friends.
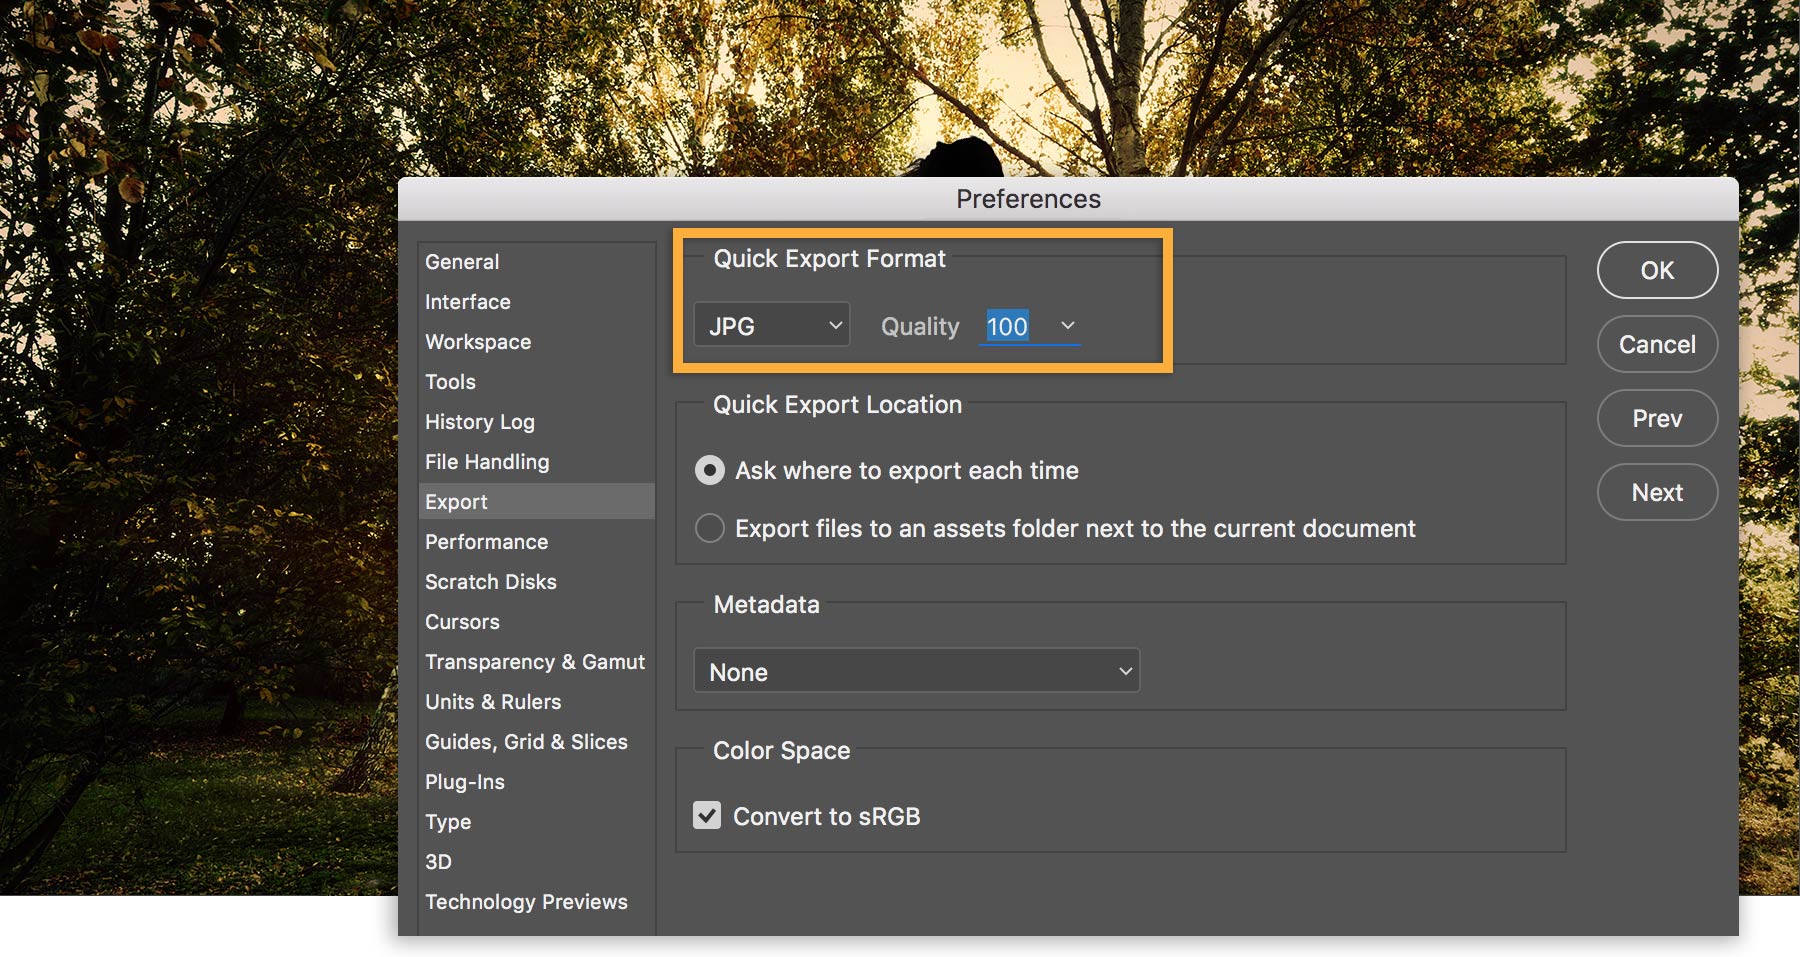
To export your file, choose File > Export > Export Preferences.
Under Quick Export Format, choose a format to use as your regular export setting. For example, to export a small file size that’s easy to include in social media or email, select JPG as the format, and Quality as 100.
Click OK. From now on, when you want to use these settings, simply choose File > Export > Quick Export.
If you want to fine-tune your settings each time you export your Photoshop file, choose File > Export > Export As. Learn more about Export As settings.
* Nguồn: Photoshop CC
Ý KIẾN THÀNH VIÊN