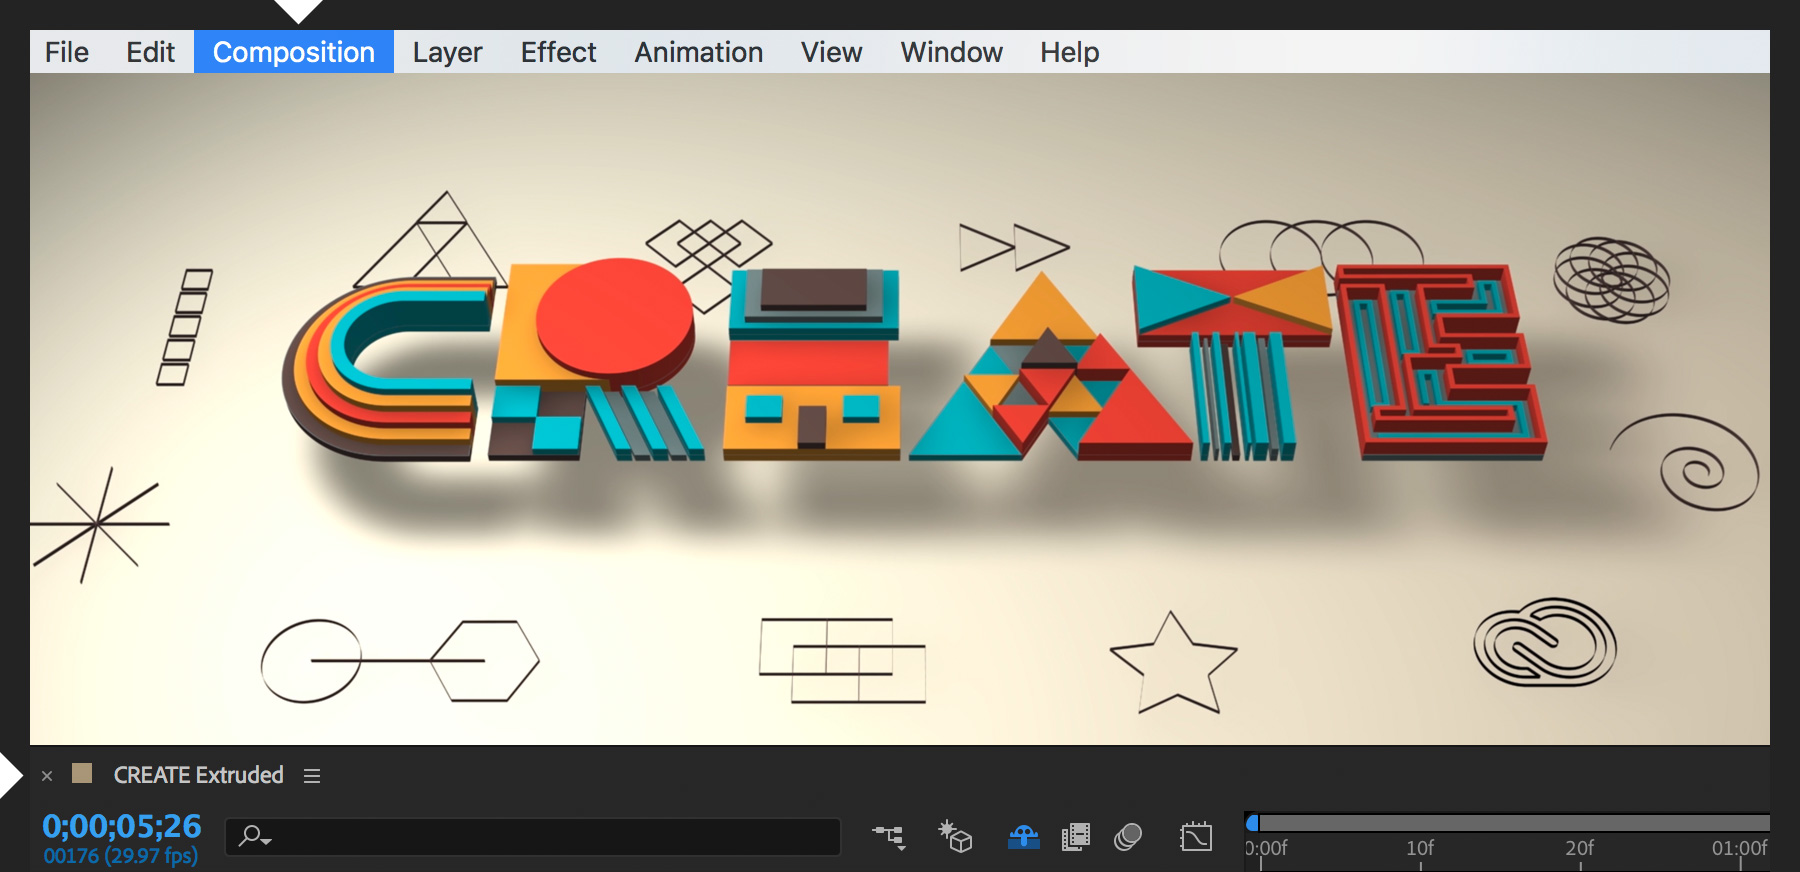
Adobe Media Encoder takes the pain out of getting your After Effects composition online. Select your comp and choose Composition > Add to Adobe Media Encoder Queue. This launches Media Encoder and places your comp in the queue for rendering.
Render video for YouTube in After Effects CC
Share your Adobe After Effects CC project directly on social media by applying timesaving render presets in Adobe Media Encoder CC.

What you'll need
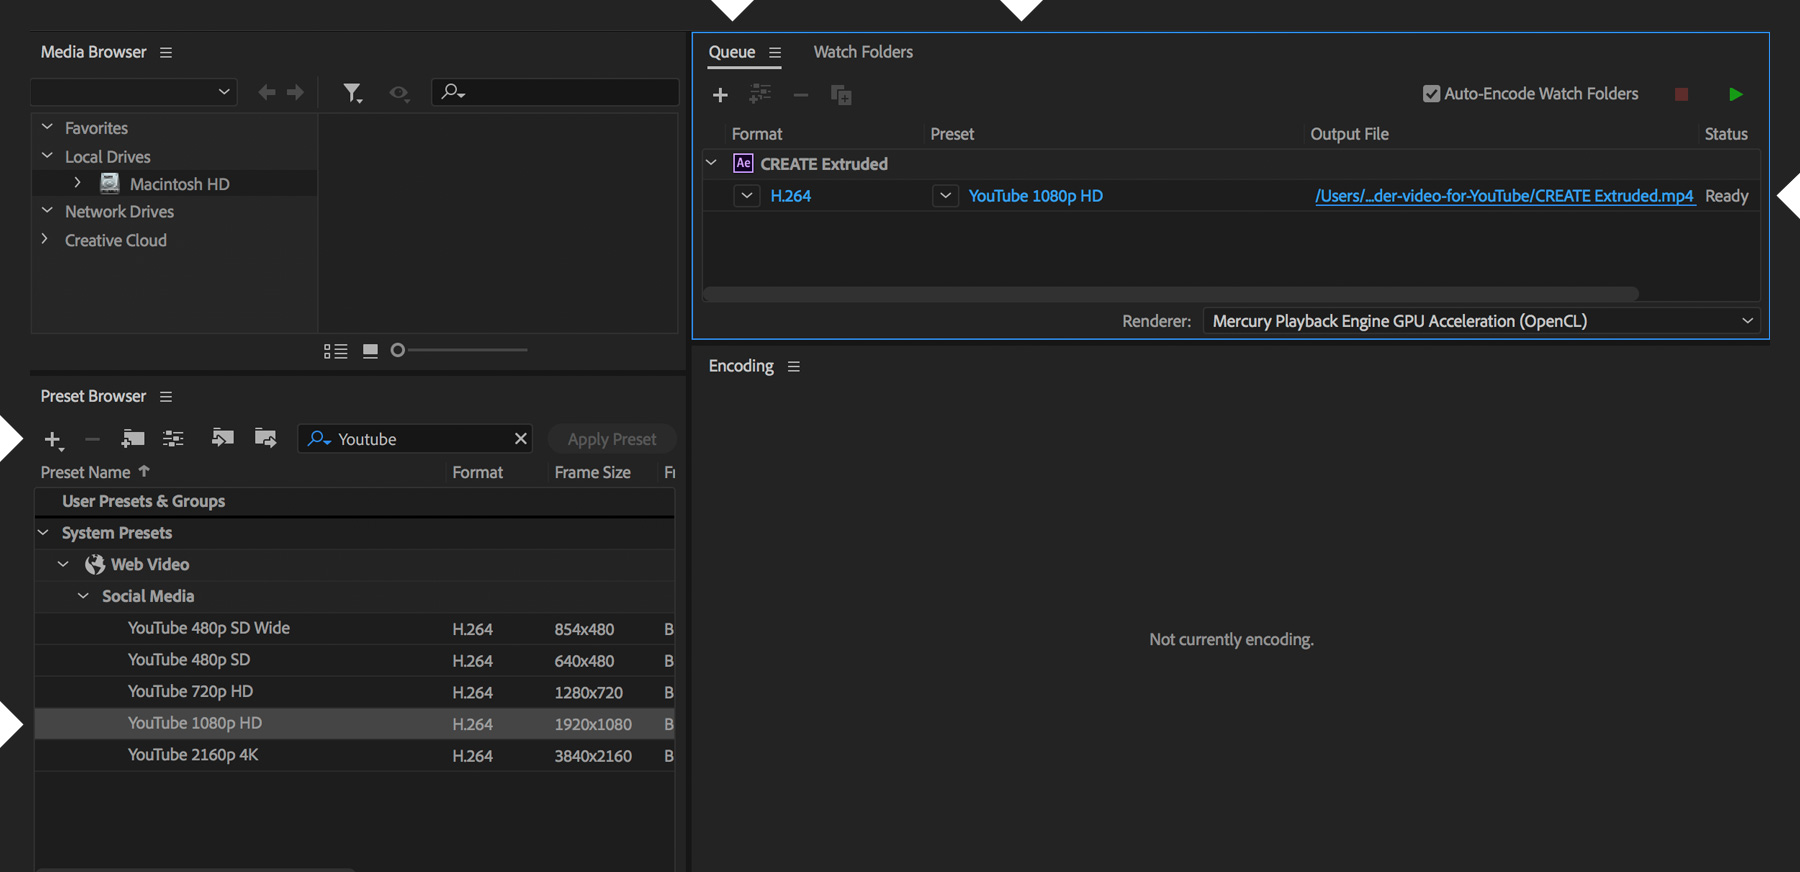
The Preset Browser panel offers you dozens of presets. To keep things simple, enter youtube to narrow the list of Social Media presets. (You’ll also see presets for Facebook, Twitter, and Vimeo.) A solid choice is the YouTube 1080p HD preset. Drag it directly on top of the item in the Queue panel. Click the blue text under Output File to change the filename and where to save your output.
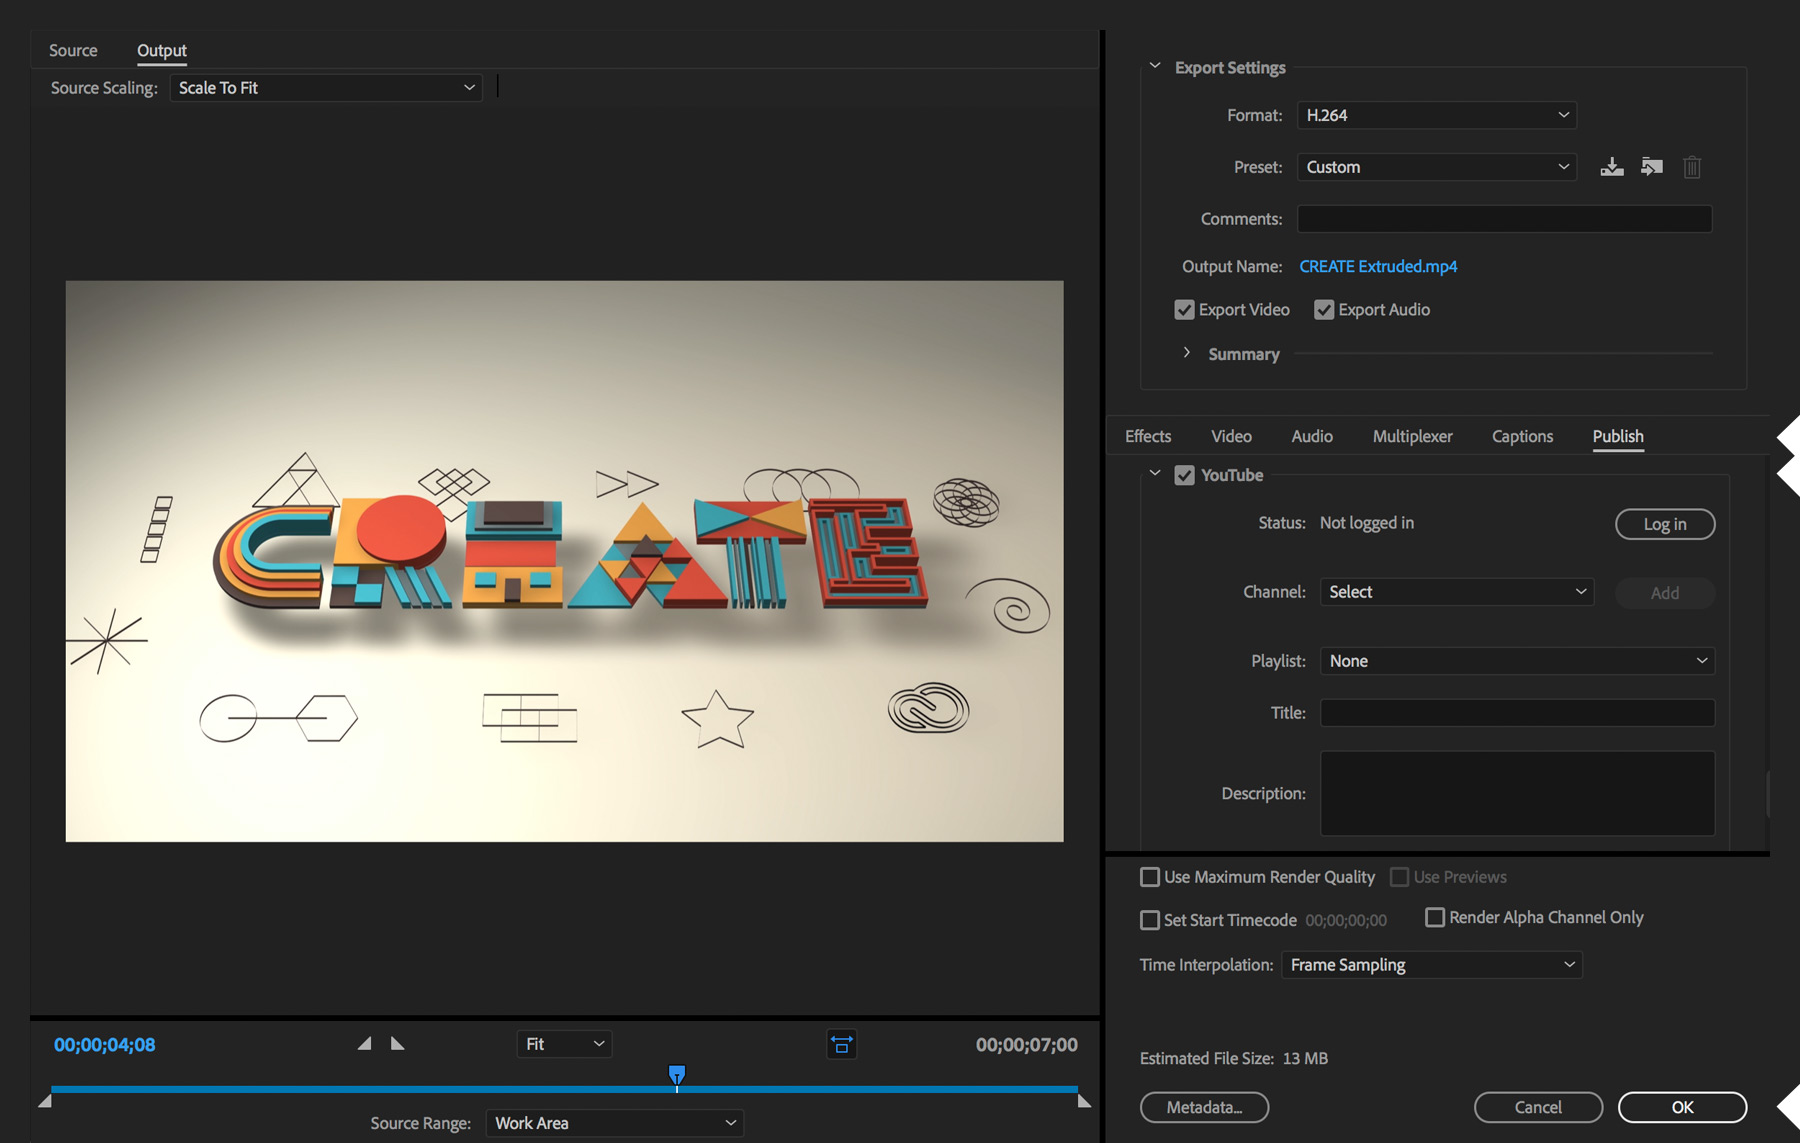
You’re ready to render, but you haven’t told Media Encoder where to upload your video. Click the blue preset name to open the Export Settings dialog box. There you can click the Publish tab, scroll down to the YouTube section, and log in to your account. Click OK to return to the queue.
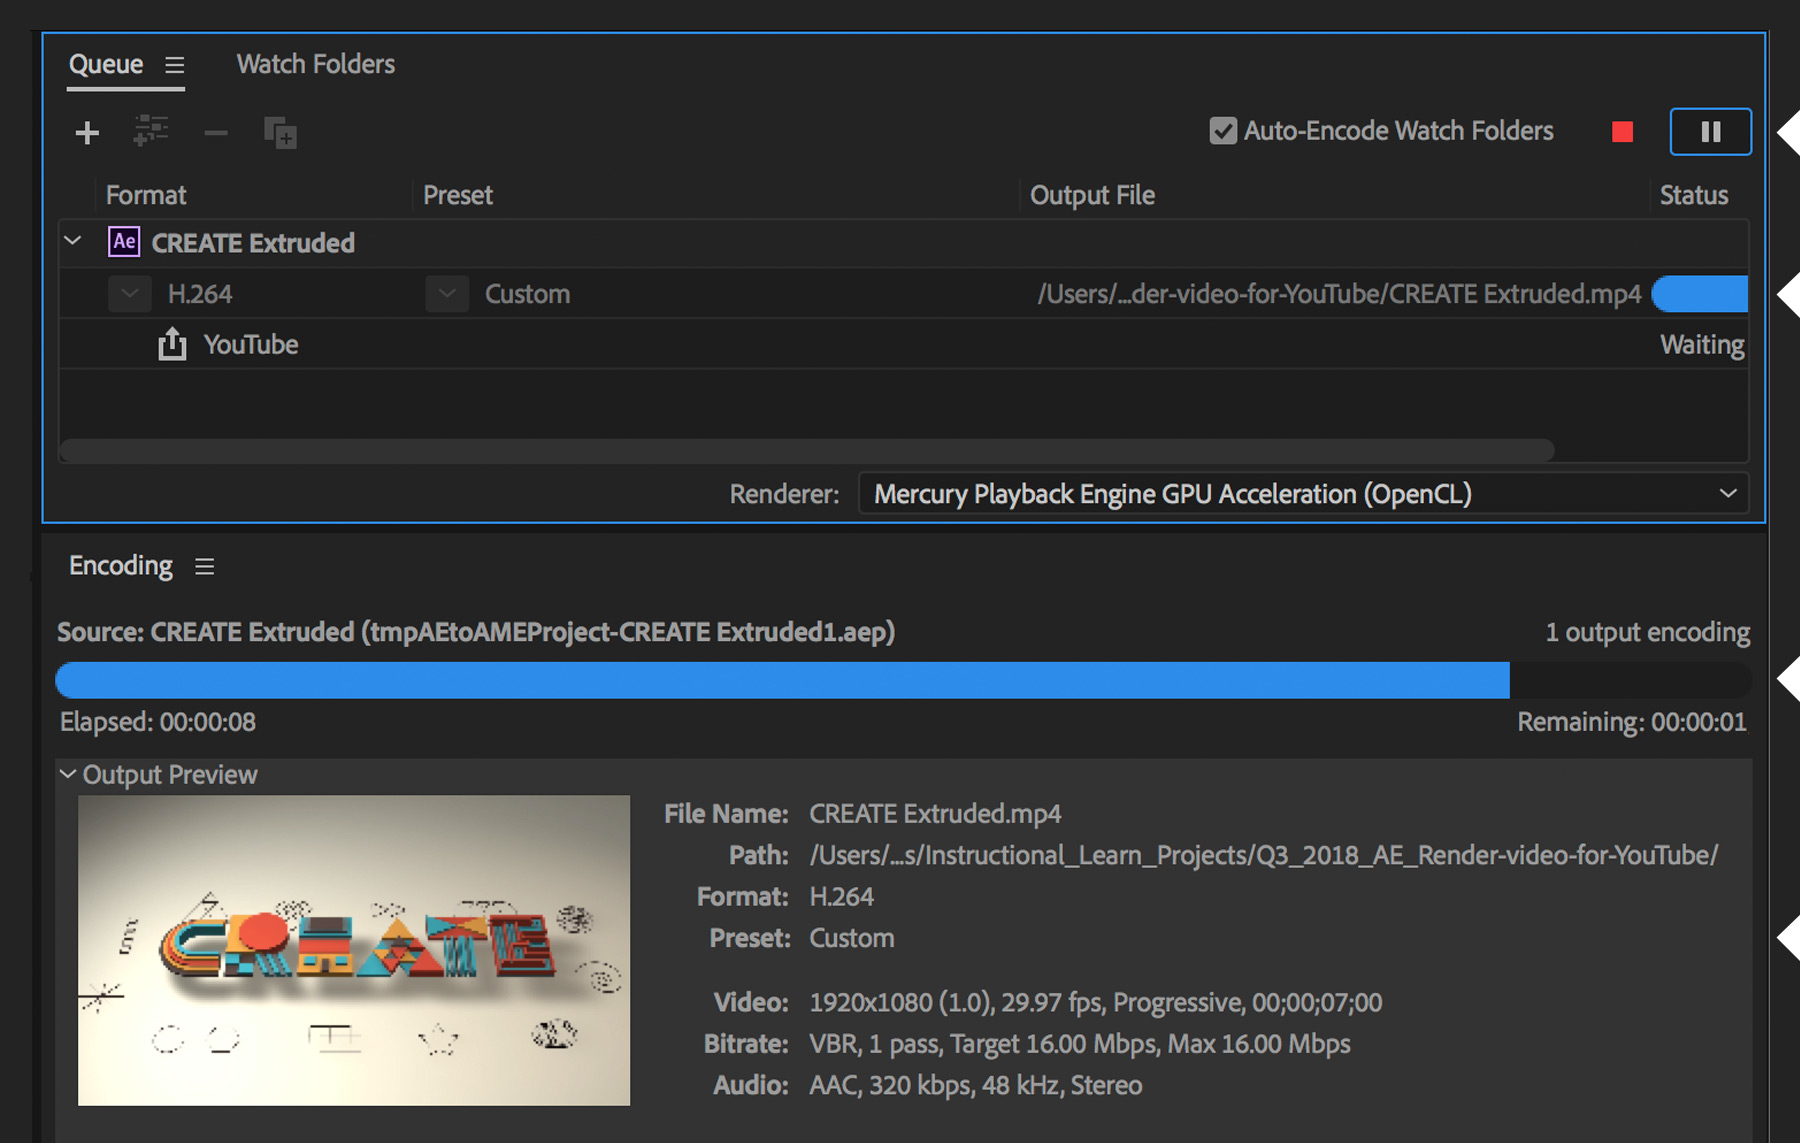
Now you’re ready. Click the green Start Queue button to start rendering. See the progress of the render process, as well as a video preview, in the Encoding panel. After the rendering is done, Media Encoder will upload your video. After the video is uploaded, click the blue video link to watch the YouTube video in your web browser.
The neat thing about Media Encoder is that you can always send more comps from After Effects to the queue at any time by choosing Composition > Add to Adobe Media Encoder Queue. Either continue working on your project or open a new one while your comp renders in the background.
* Nguồn: After Effects CC
Ý KIẾN THÀNH VIÊN