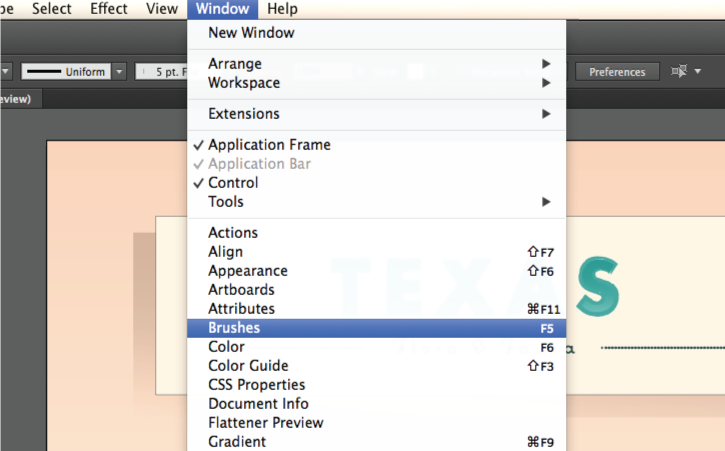
Open the Brushes panel by choosing Window > Brushes, or press F5 on your keyboard.
Add painterly effects with brushes in Illustrator CC
Experiment with applying brush strokes to objects, adding texture, interest, and details to your illustration.

What you'll need

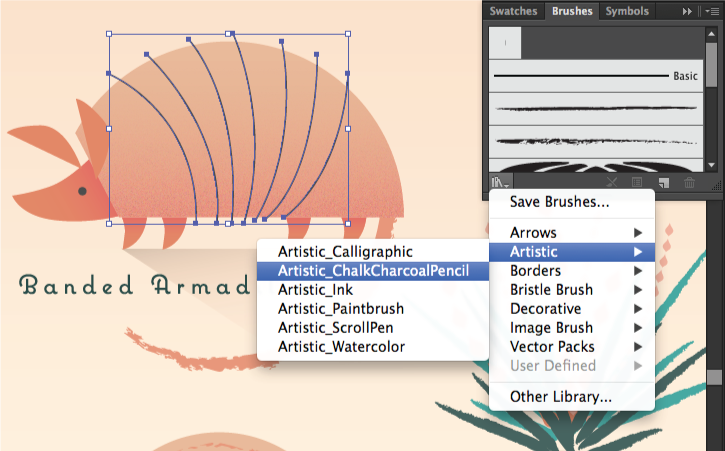
With the Selection tool, click one of the bands of the armadillo to select them all. They will be highlighted in blue indicating they are selected.

Click the small icon on the lower left corner of the Brushes panel to open the Brush Libraries menu. Choose Artistic > Artistic_ChalkCharcoalPencil to load the Chalk and Charcoal Pencil artistic brushes.

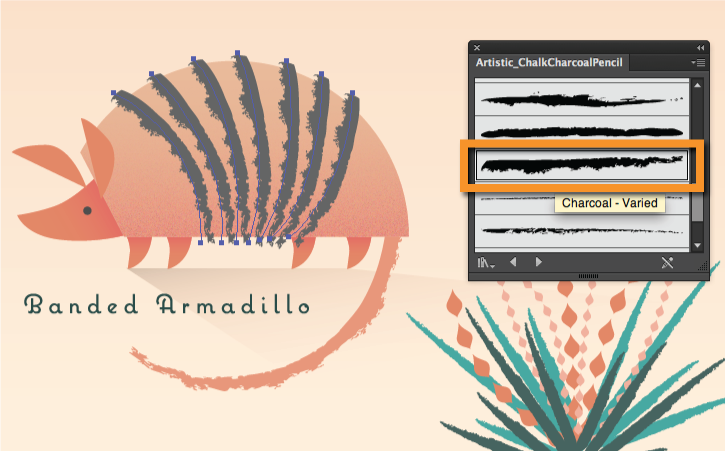
Scroll down and hover your cursor over each brush to view the names of the brushes. Click the Charcoal - Varied brush to apply it to the selected lines.

Locate the Stroke color swatch icon on the far left side of the Control panel. Click the down-facing arrow to open the Swatches panel and click the “Armadillo stripes” swatch to apply that color to the new brush strokes.

With the Selection tool, click the cream-colored rectangle surrounding the “Texas” title at the top of the image. Open the Brush library panel and choose Borders > Borders_Geometric.
Click the Geometric_15 border to apply it to the selected frame.

Locate the Stroke weight dropdown menu on the Control panel. Click the down-facing arrow and select 0.5 pt to scale the width of the stroke.

Select other objects in the composition to see what sort of brush strokes have been applied. You can quickly see which brush stroke is active in the Control panel.
Try applying other brush strokes, or changing the stroke color or weight of the brush strokes. You can also fine-tune brush strokes by double-clicking the brush in the Brushes panel.

* Nguồn: Illustrator CC
Ý KIẾN THÀNH VIÊN