Adobe Photoshop Lightroom is now Adobe Lightroom Classic CC, with the same functionality and features. If you're looking for the all-new photography service, check out Lightroom CC.
Alter a photo's perspective in Lightroom Classic
Learn how to correct distorted horizontal or vertical perspective with Upright and Transform controls in Lightroom Classic CC.
What you'll need
Open Lightroom Classic CC and import a photo that needs perspective correction. You can use your own photo or the sample file provided on this page. To learn how to import, see Import photos to Lightroom Classic CC.
Hint: If you're using your own photo, select one with plenty of horizontal or vertical lines to try out this feature. Try using images of architecture, interior settings, or horizons.
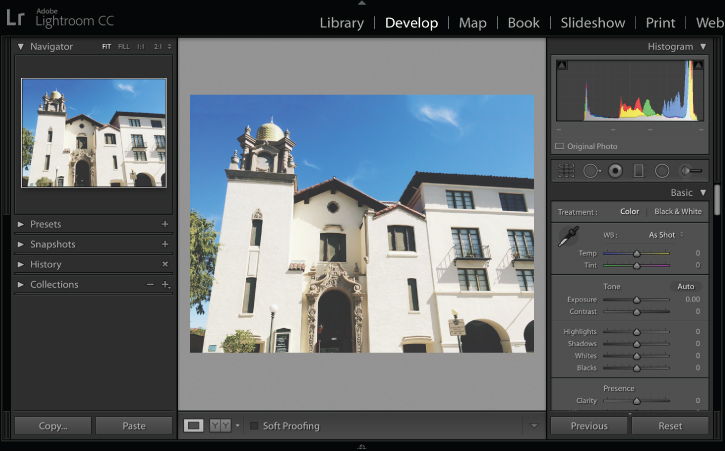
Click Develop at the top of the screen. The sample photo was taken from a low angle, causing the building to look like it's tilted backward and distorted. We can correct the perspective and distortion.
Tip: To get the best result from the Upright options we'll explore in the next step, first expand the Lens Corrections panel and check Enable Profile Corrections. If Lightroom detects that a photo was shot with a supported lens, it will automatically correct for lens-related distortions.
Scroll down on the right to the Transform panel, and click its title bar to expand it.
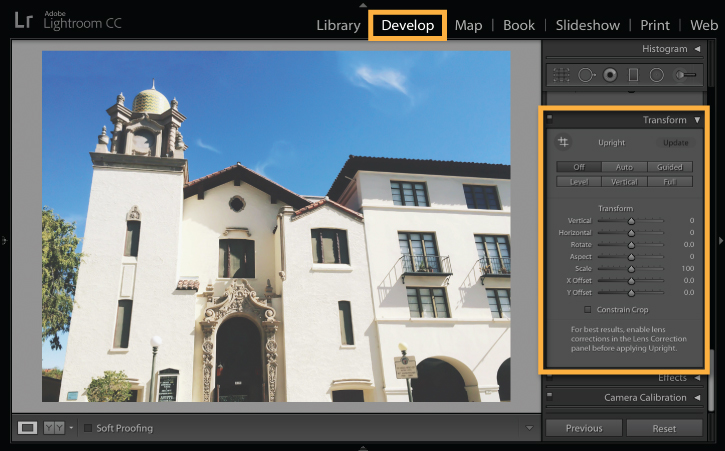
Notice the Upright options in the Transform panel that you can use to correct the perspective of the photo:
- Level corrects horizontal distortions.
- Vertical corrects vertical distortions.
- Auto corrects both vertical and horizontal distortions while balancing the overall image and preserving as much of the original image as possible.
- Full also corrects both vertical and horizontal distortions. Unlike Auto, the Full option corrects the most extreme distortions, which sometimes results in cropping off parts of the image you may want to keep.
- Guided allows you to draw and specify Upright Guides to further control perspective correction.
We prefer the Full Upright option for the sample photo. Experiment with the different Upright options to find the correction that best suits your photo. You can click the Reset button at any time to return to your original photo.
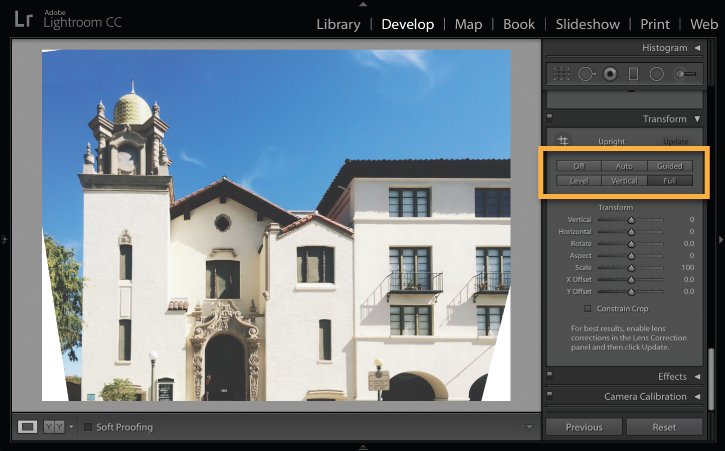
When correcting the perspective of a photo, you may get white areas where the correction shifts the image beyond the boundary of the original image dimensions. In the last step, this is what happened after applying the Full Upright option.
To fix this, select the Constrain Crop option to automatically crop the photo according to the original dimensions.
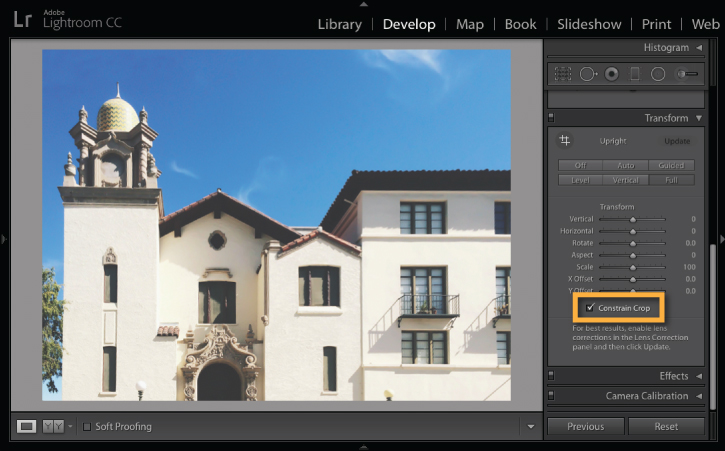
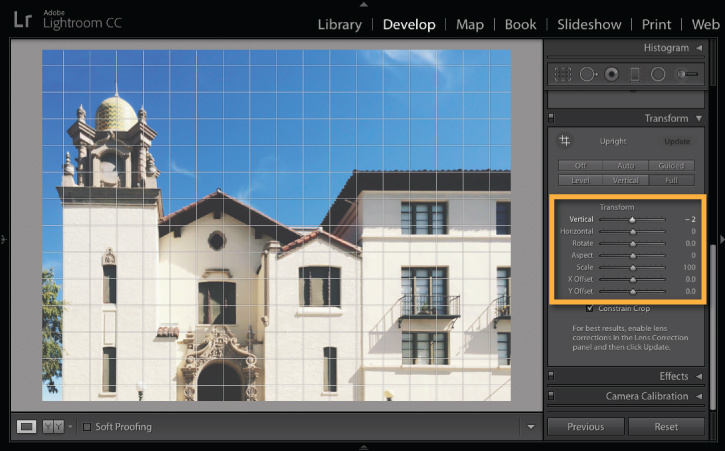
In addition to or instead of applying an Upright option, you can manually adjust the perspective of a photo using the sliders in the Transform panel.
For the sample photo, fine-tune the vertical perspective of the adjusted photo by dragging the Vertical slider slightly to the left.
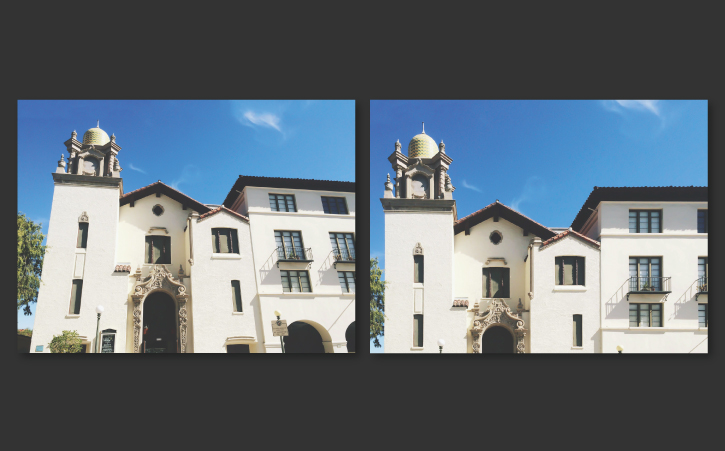
Here you can see the original photo compared to the photo with corrected perspective.
Perspective correction works best with photos that have prominent horizontal or vertical lines. Experiment with the Upright and Transform controls to correct perspective on other subjects, like panoramas or photos taken from extreme angles.
* Nguồn: Lightroom Classic
Ý KIẾN THÀNH VIÊN