This sample file is an Adobe Stock asset you can use to practice what you learn in this tutorial. If you want to use the sample file beyond this tutorial, you can purchase a license on Adobe Stock. Check out the ReadMe file in the folder for the terms that apply to your use of this sample file.
Animate a 3D title reveal in After Effects CC
Apply text animation presets in Adobe After Effects CC to gradually reveal a three-dimensional title floating in space. You’ll use the Cinema 4D Renderer to extrude text into 3D and then add lights to illuminate the composition.

What you'll need
We’ve already placed some text on a layer that’s sitting above a background photo. The title looks flat, but you can make it look more dimensional by extruding it. Twirl open the Text layer’s properties to reveal its Transform options. Click the 3D cube icon to toggle the 3D layer on, and then click Change Renderer next to the grayed-out Geometry Options to open the Composition Settings dialog box. Change the Renderer to Cinema 4D and click OK.

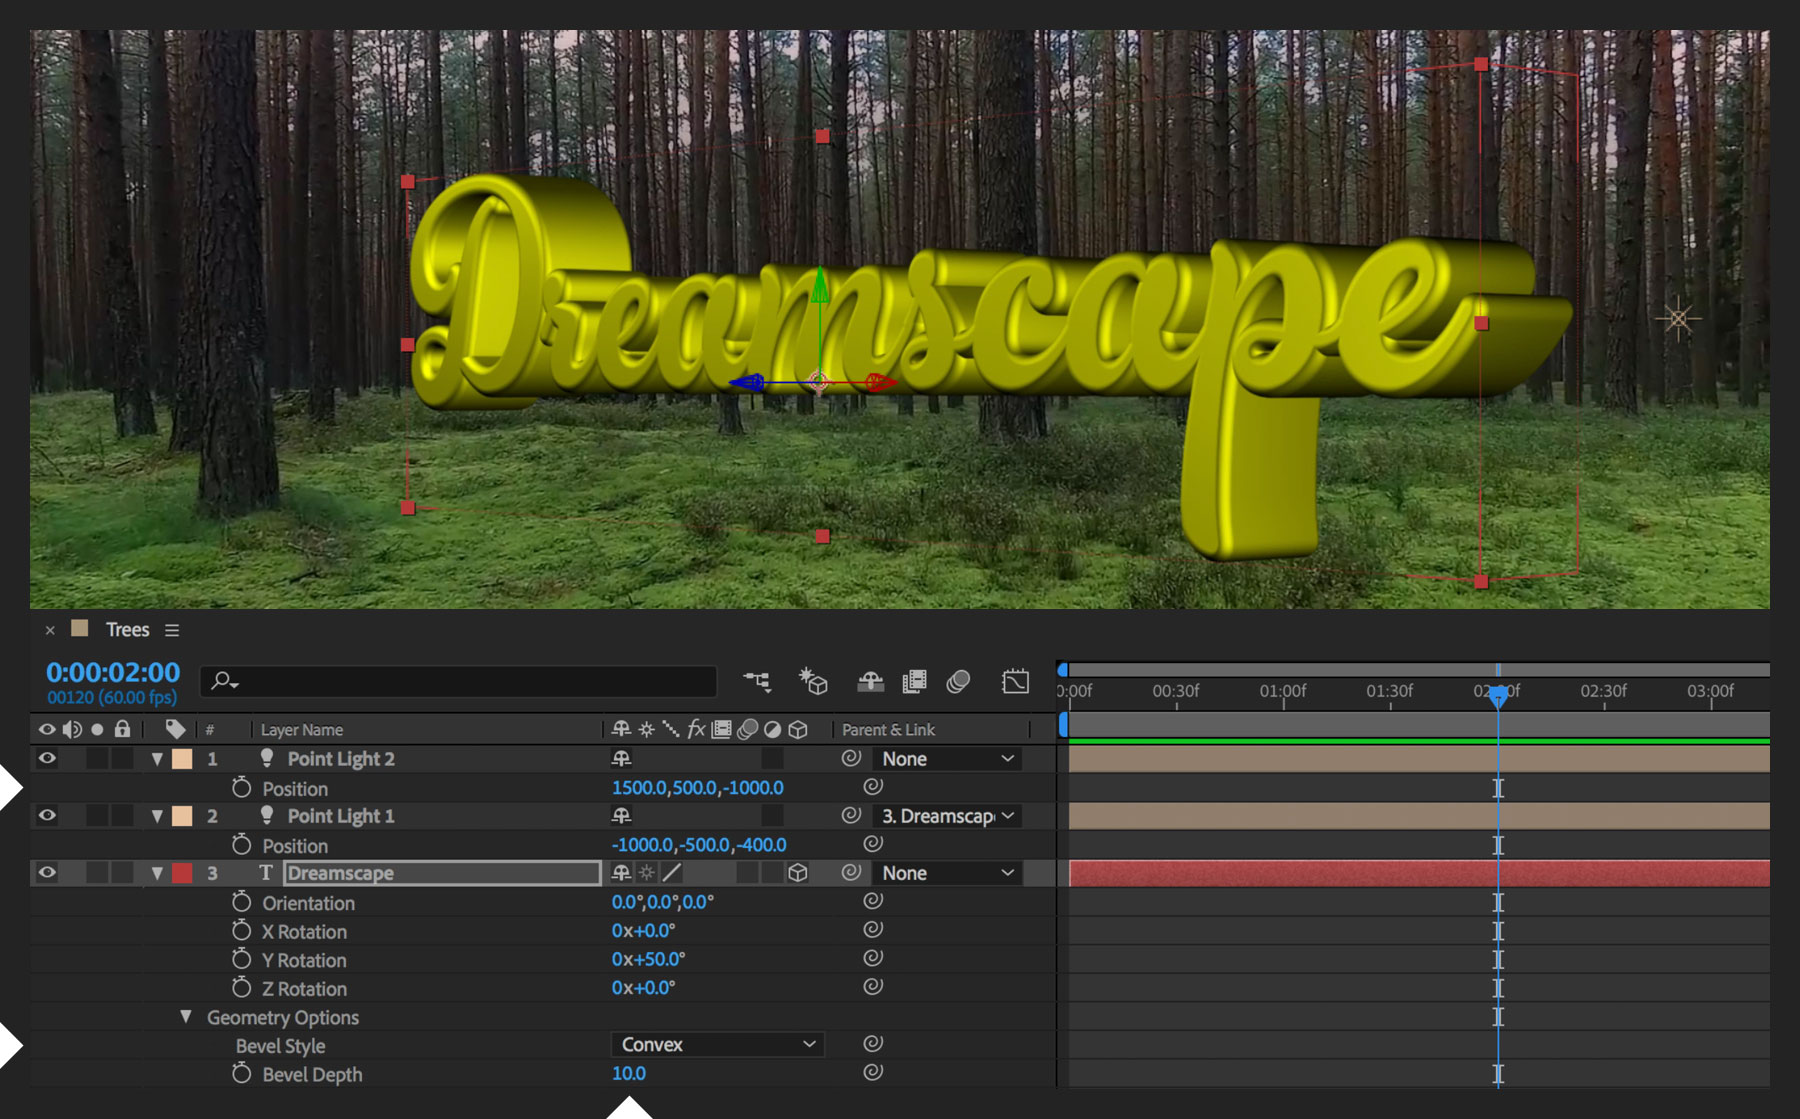
Now that you’ve enabled the Geometry Options, you can extrude the text. Select the Text layer and press R to open its Rotation settings. Drag the Y Rotation value to angle the text in space to your liking. Experiment with how the extruded text looks from different angles. If you think it’s hard to read, that’s because there’s no light casting shadows that define the letters’ edges.

To shine a light on things, open the Layer menu and choose New > Light. In the Light Settings dialog box, specify a Point light type with full intensity and no falloff but with shadows, and then click OK. On the Point Light layer, in the Parent & Link column, open the drop-down menu and set it to inherit transforms from the text layer (instead of None). Press P to reveal the Position values of the light and move the X, Y, and Z coordinates so that the light is to the left of, above, and in front of the text.

You may not be able to adequately illuminate the entire word using just one light, so add another point light — only this time position it more to the right and lower than the first one. Toggle the eye icon for each Point Light layer so you can see how each light contributes to the overall result. Since the text is now better illuminated, go back to its Geometry Options and add a Convex bevel style with a Bevel Depth value that smooths out the edges slightly.

To create a gradual reveal effect, position the playhead where you want the animation to start. In the Effects & Presets panel, enter fade up in the search box to filter the results. Drag the Fade Up Characters effect to the text layer in the timeline. Press U to reveal the animation’s keyframes. By default, the effect lasts two seconds. Drag either keyframe to adjust the effect’s duration. With a keyframe selected, open the Animation menu and choose Keyframe Assistant > Easy Ease (or just press F9) to smooth out the reveal’s effect.

To save computer resources while you preview your composition, it’s a good idea to lower your render settings. Click the wrench icon at the top right of the Composition panel. In the Cinema 4D Renderer Options dialog box, drag the slider to Draft and click OK. Once you’re ready to render the final output, go back to the Renderer Options dialog box and this time drag the slider to the right — just until the Anti-Aliasing setting changes to Best — and click OK.

Now the 3D title will slowly reveal itself over time. Try keyframing the text’s position so that as each letter comes into view, the word also moves across the screen — adding to the dimensionality of the scene.
With Adobe Stock, you have access to more than 100 million high-quality, royalty-free images including photos, graphics, videos, and templates to jump-start your creative projects. Try Adobe Stock and get 10 free images.
* Nguồn: After Effects CC
Ý KIẾN THÀNH VIÊN