Open an image in Photoshop. Then, click the Adjustment Layer icon in the Layers panel and choose Gradient Map.
Colorize a photo using Photographic Toning presets in Photoshop CC
Infuse a lackluster image with rich colors, change the mood of a photo, or add color to a black-and-white photo by applying Photographic Toning presets in Adobe Photoshop CC.

What you'll need

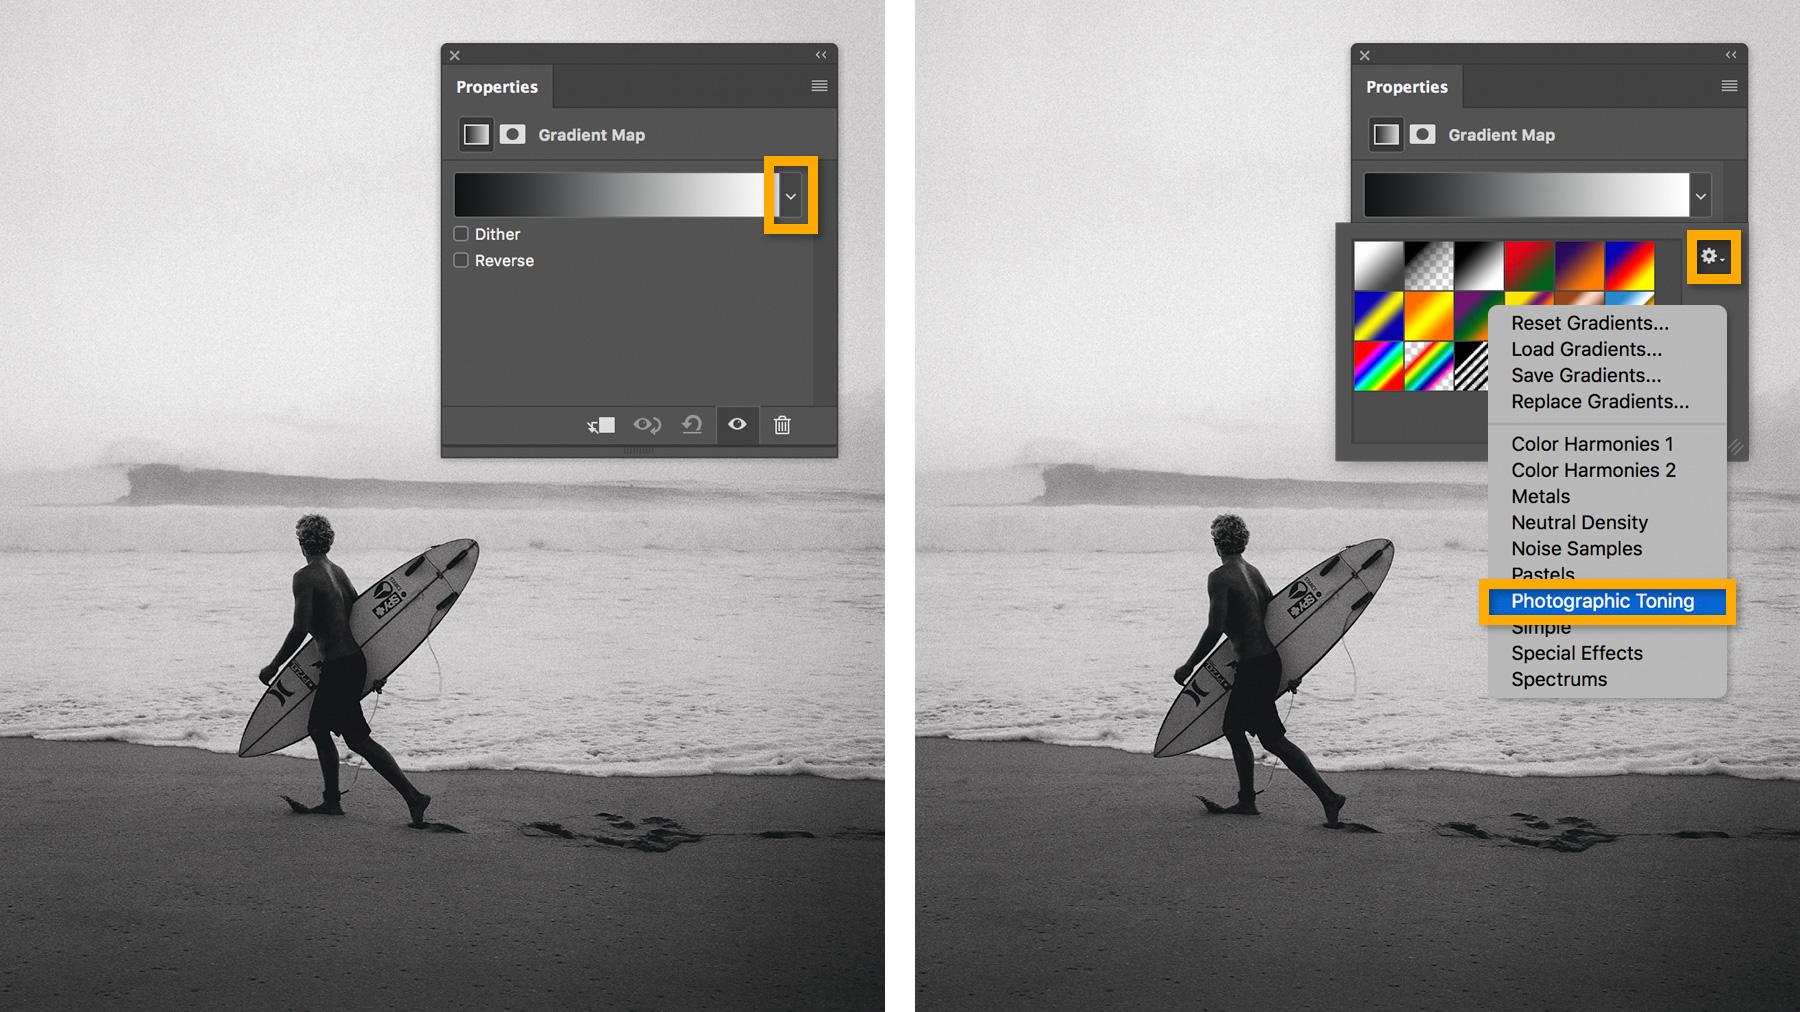
In the Properties panel, click the arrow to the right of the gradient. Then, click the gear icon and choose Photographic Toning. Click OK when prompted to replace the current gradients.
Tip: You can always go back to the default gradients by clicking the gear icon and choosing Reset Gradients.


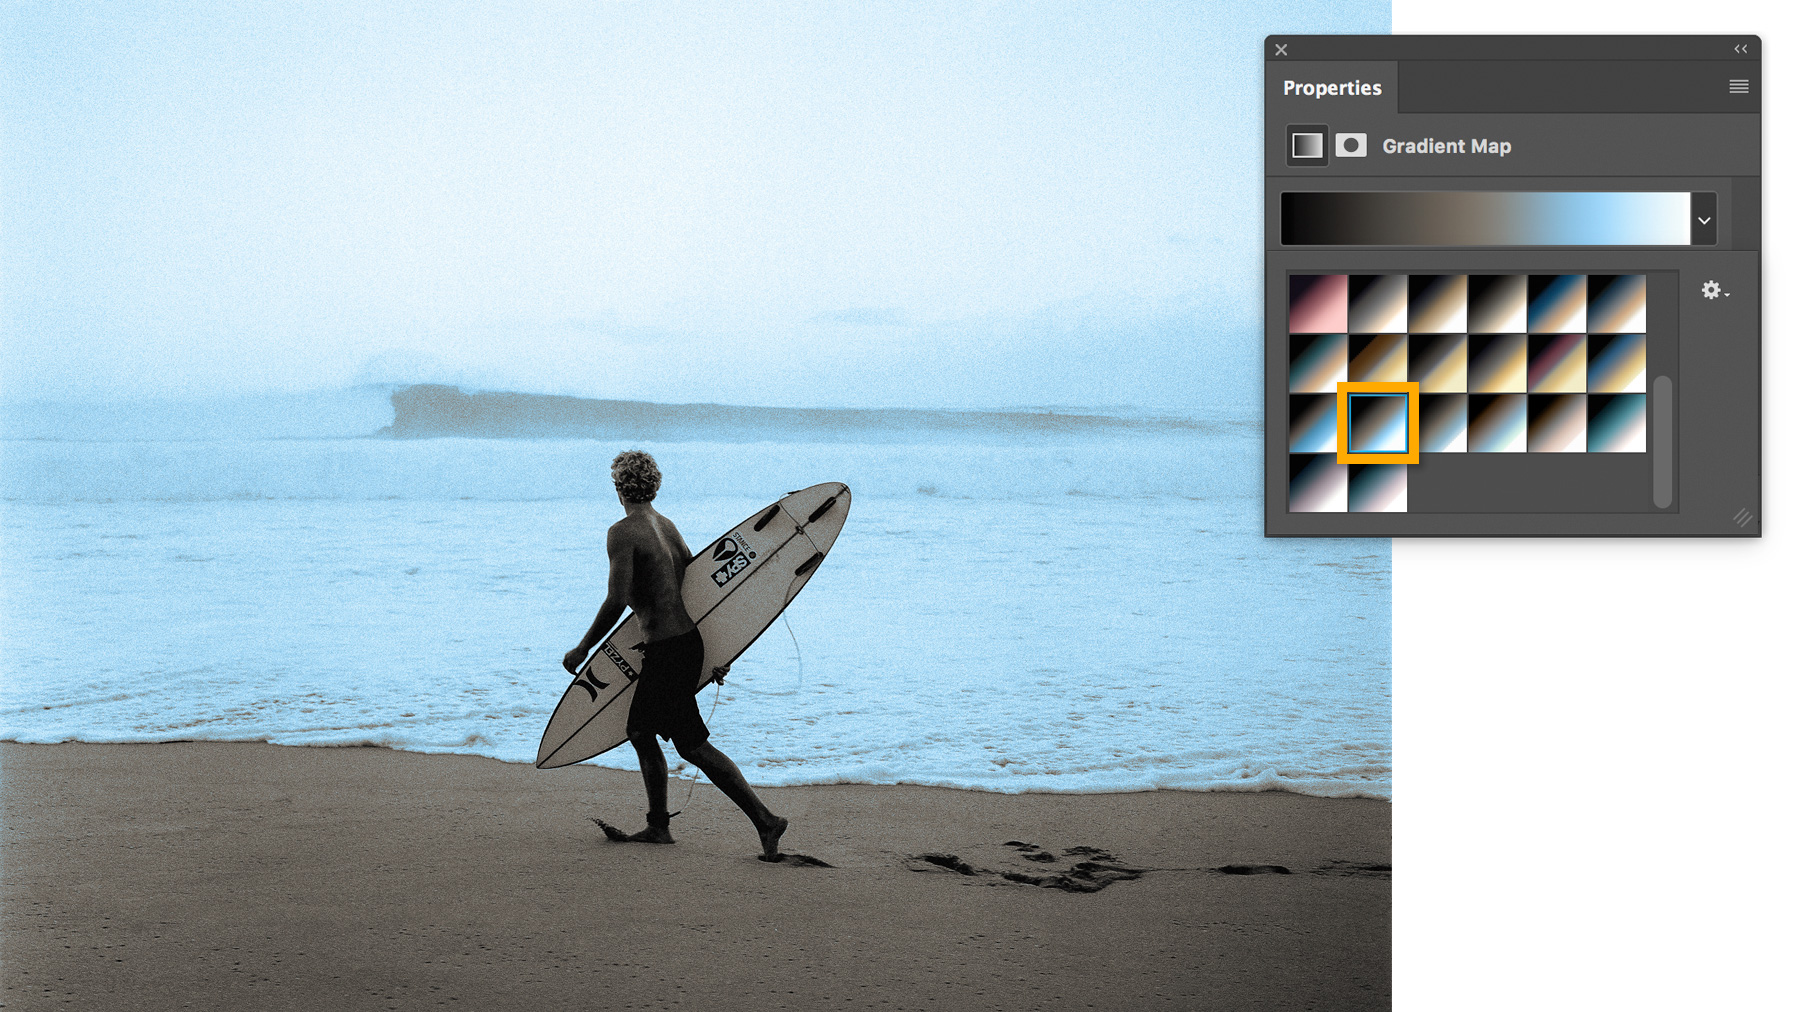
Experiment with different presets to see which one complements your image. For the sample photo, we chose "Blue-Selenium 2" to add a blue cast to the highlights and warm undertones to the shadows.

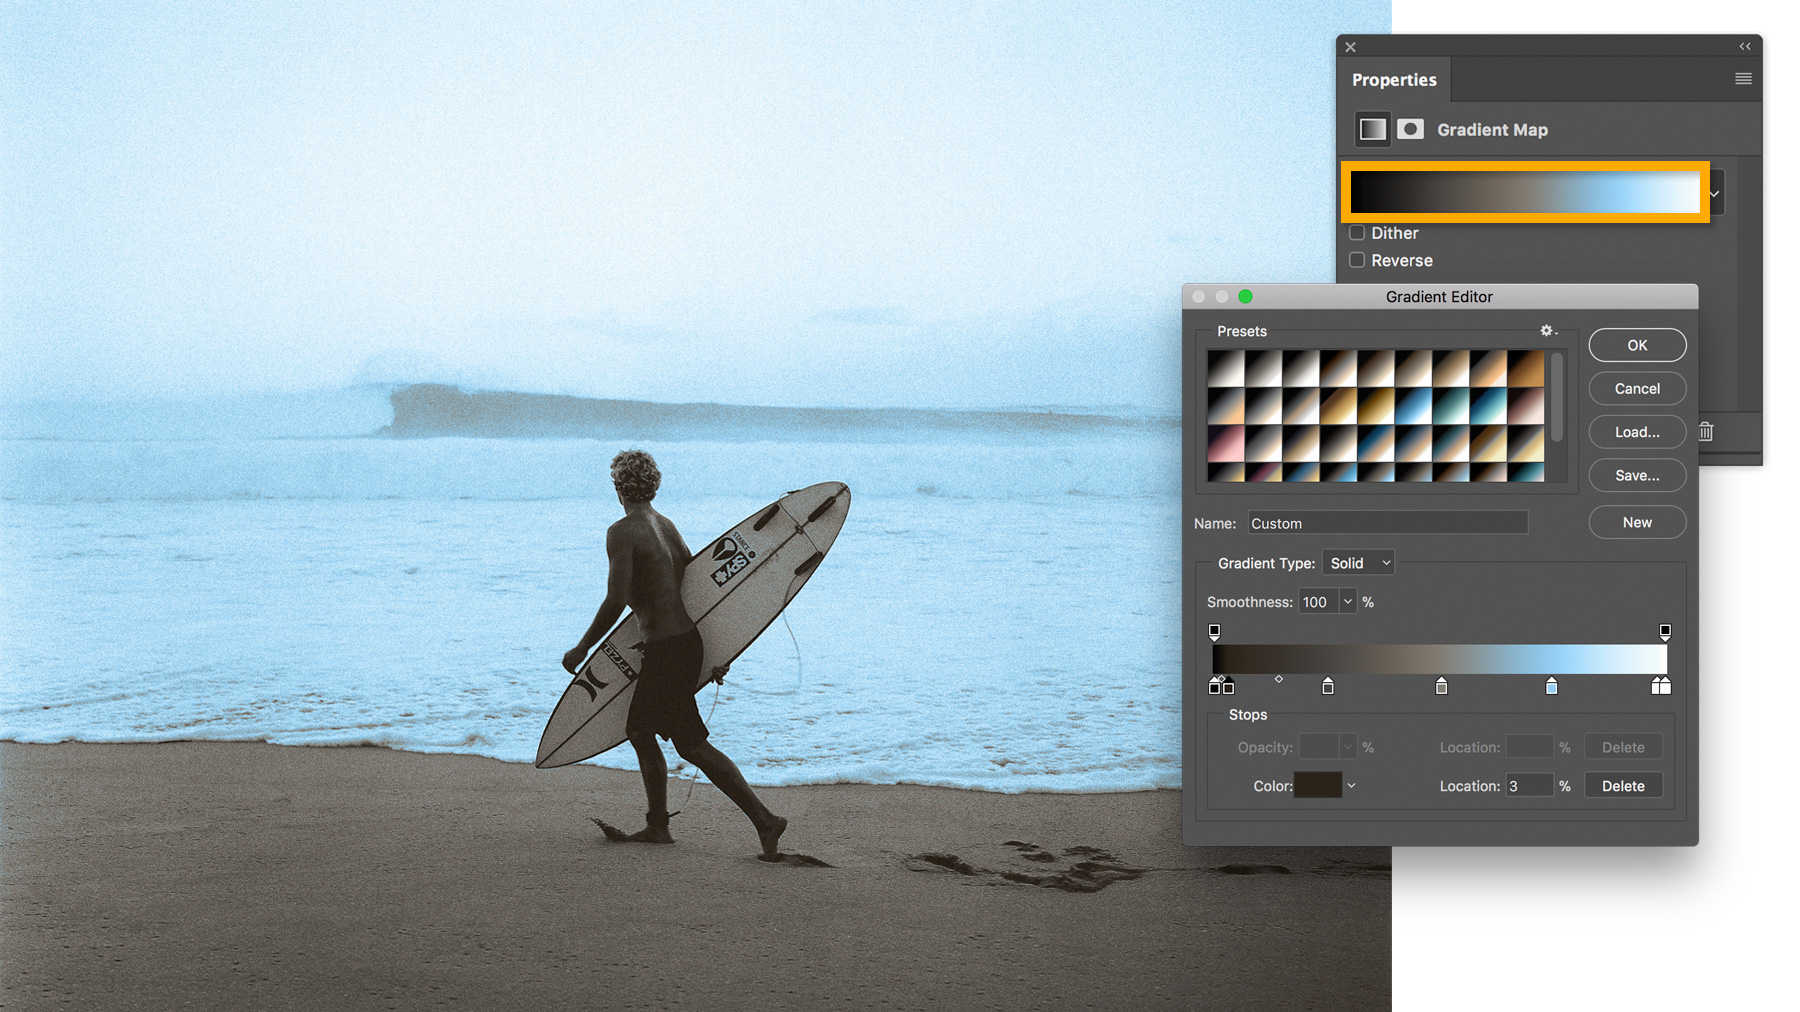
Double-click the gradient to open the Gradient Editor and fine-tune the settings. Use the color stops to adjust the transitions between toned areas, or change the colors of the gradient altogether.

Tip: Save your image as a PSD or TIFF file so you can adjust the Photographic Toning settings later. You can save an extra copy in a different format, such as JPEG or PNG, for posting online.
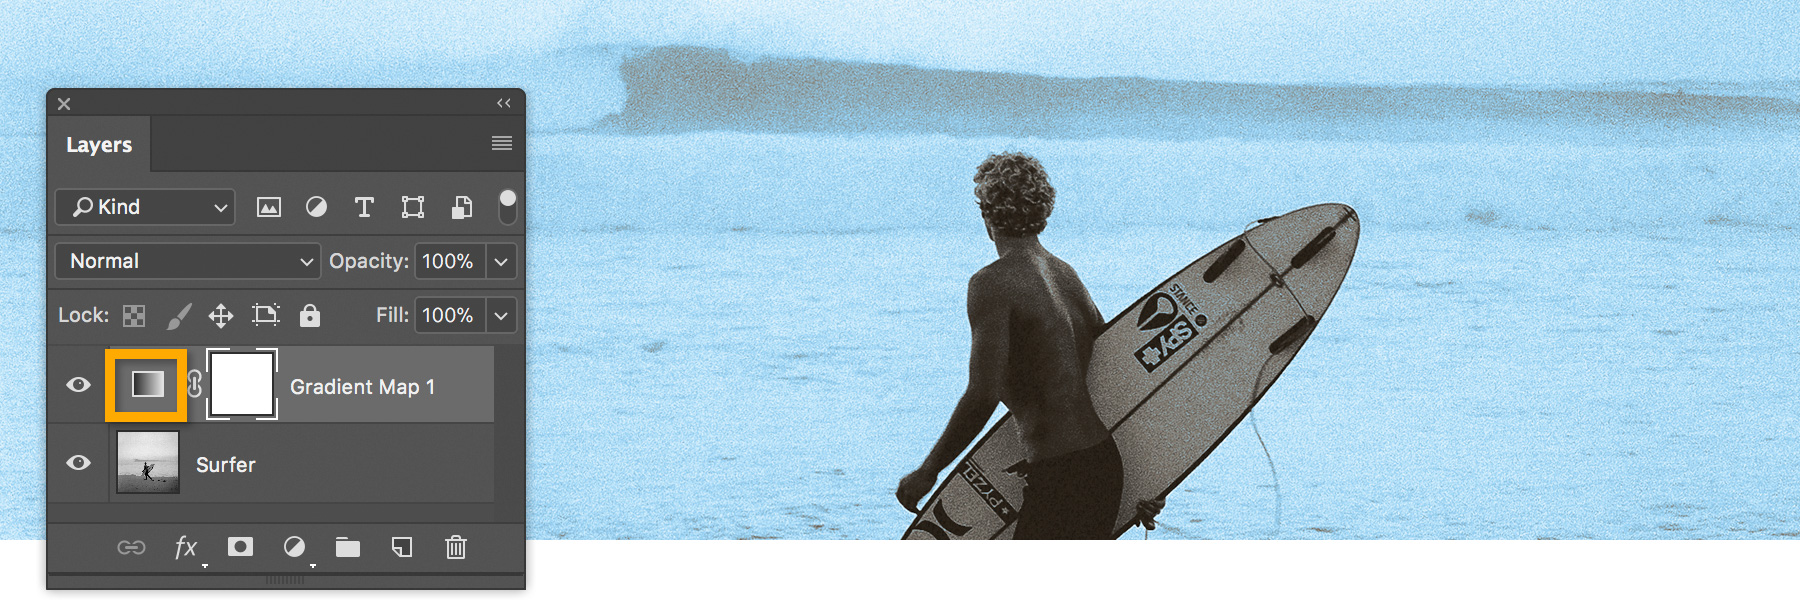
To adjust the Photographic Toning settings, double-click the gradient icon next to the Gradient Map layer in the Layers panel.

* Nguồn: Photoshop CC
Ý KIẾN THÀNH VIÊN