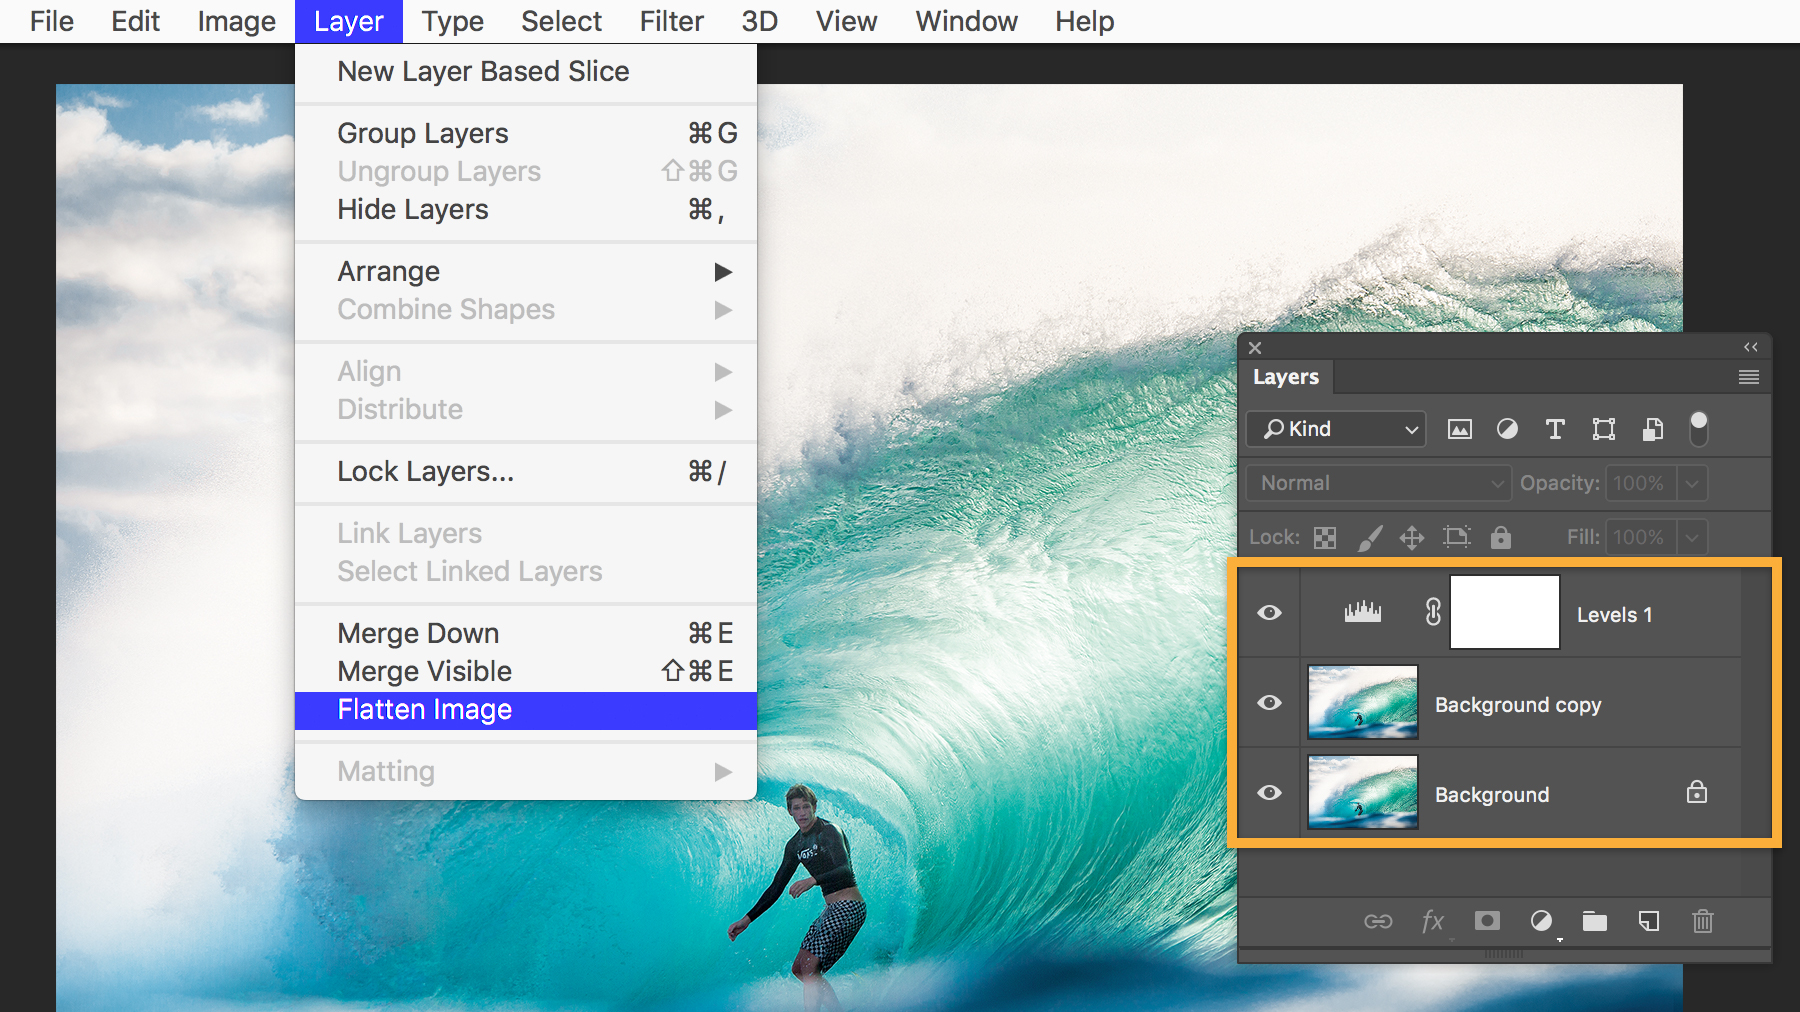
Open the photo in Photoshop and look at the Layers panel. If there are multiple layers (for instance, if you’ve done earlier editing), choose Layer > Flatten Image to put everything on a Background layer, indicated by a lock icon. If it’s already a Background layer, push on ahead.
Create a border or frame around an image in Photoshop CC
To add visual interest to a photo, you can give it a border in Adobe Photoshop. If you plan to create a print for a physical frame, this can give the appearance of an interior matte.


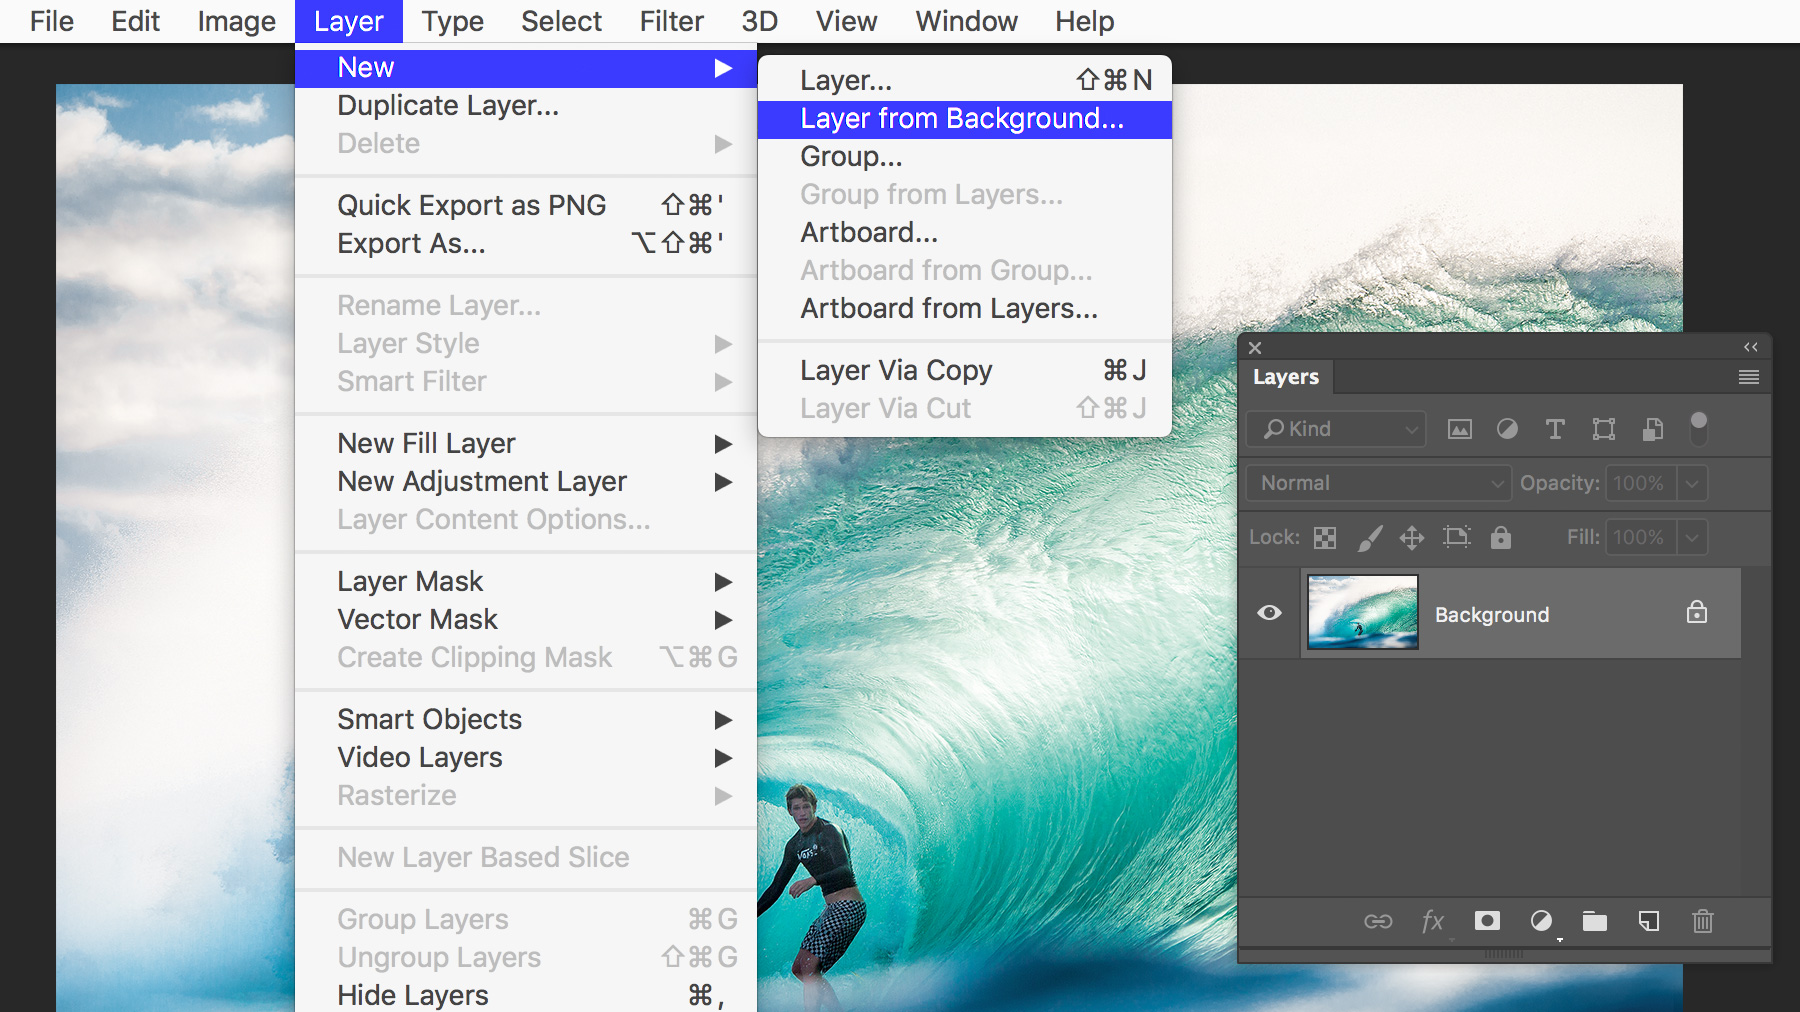
Choose Layer > New > Layer from Background and, in the dialog box that appears, click OK. This step will make it easy to adjust the border color.

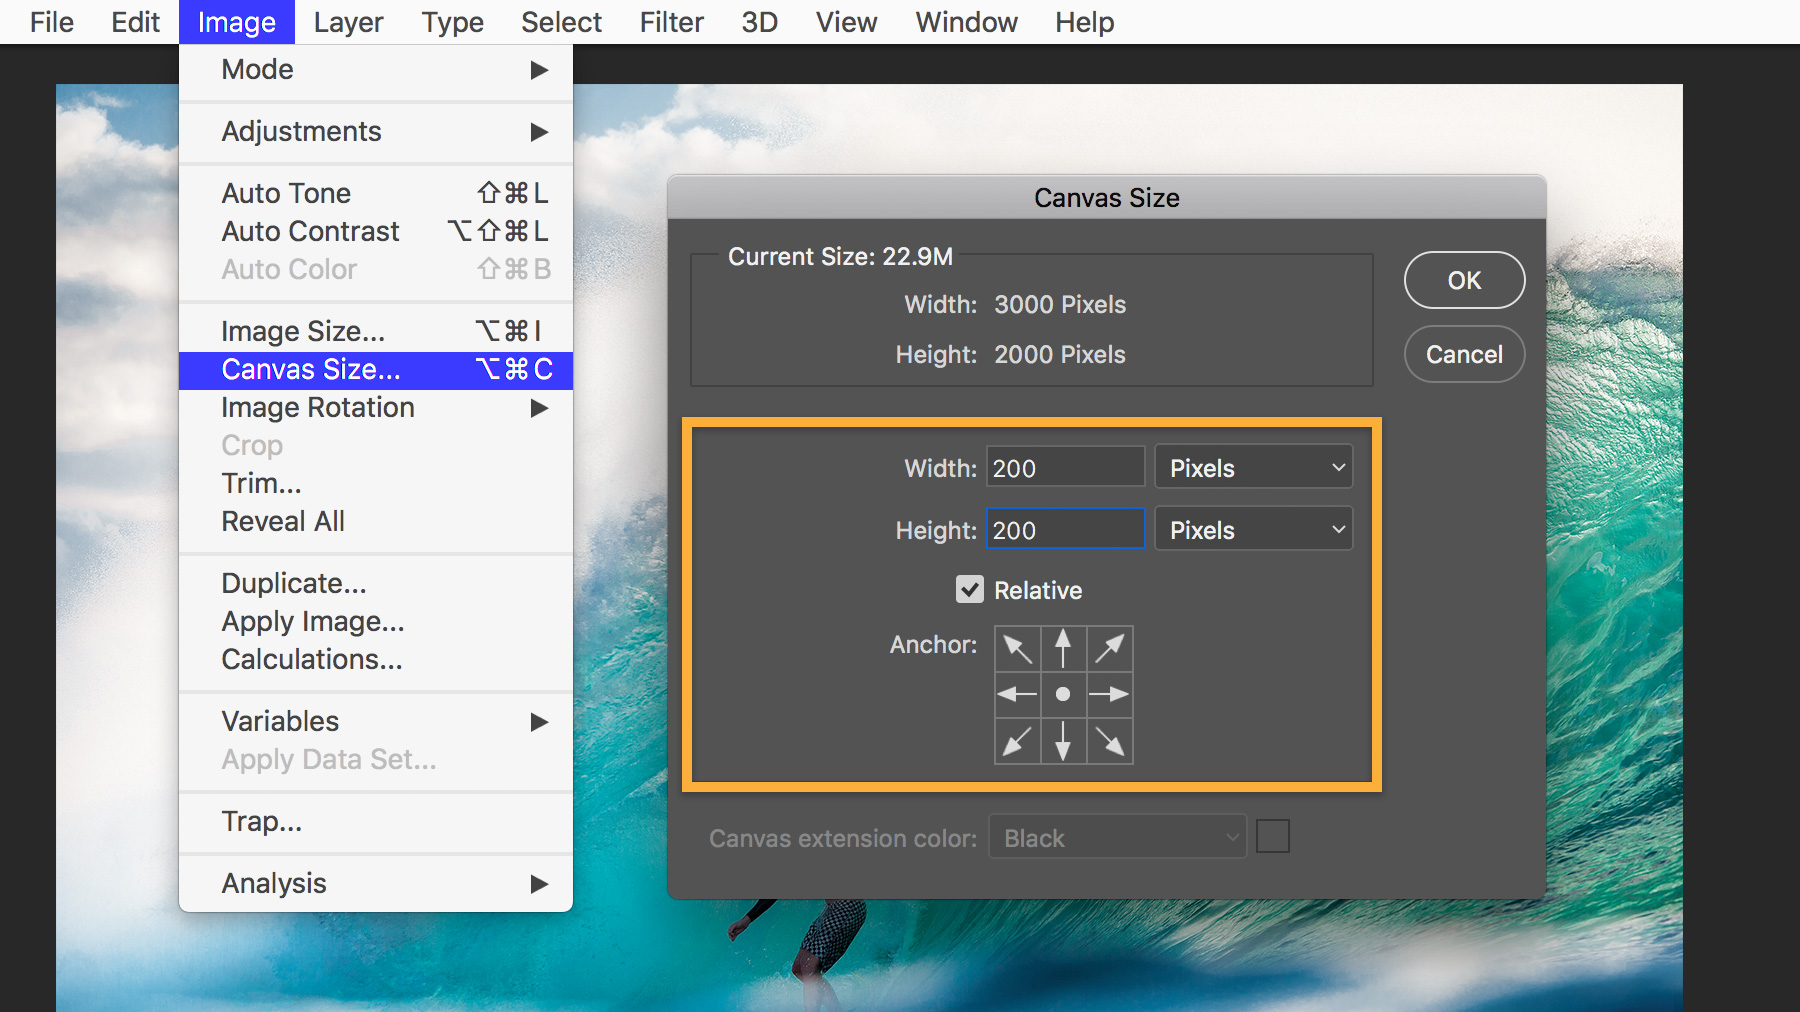
Choose Image > Canvas Size, make sure the Relative checkbox is selected, and type the number of pixels to add around the image. Each number is split between edges, so entering 200 pixels in each field results in a border width of 100 pixels. Also ensure that the Anchor is set to the center square, and then click OK.

To create the border, click the Create a New Fill or Adjustment Layer button in the Layers panel and choose Solid Color. In the dialog box, set the color as white (if it’s not already) and click OK.


To change the border color, double-click the color swatch in the adjustment layer and select a new color.

Also try using different values in the Width and Height fields of the Canvas Size dialog for different framed looks. For example, enlarge the border by entering positive numbers, or make the border thinner by entering negative numbers. Since the border color is a fill layer, it adapts to the new shape.

You probably wouldn’t permanently glue a photo into a frame, because you might change your mind. To give yourself the same freedom with your digital border, choose File > Save As to save a new version of the file. Now you can go back to the original, non-bordered version whenever you want.
* Nguồn: Photoshop CC
Ý KIẾN THÀNH VIÊN