Typekit is now Adobe Fonts.
Create title graphics in Premiere Pro CC
Easily create titles directly on your video using the Type tool in the Essential Graphics panel in Adobe Premiere Pro. Add shapes, text, images, and video to layers that you can rearrange and adjust with tools you’re familiar with from other Adobe Creative Cloud apps. Add motion or effects and export your titles as Motion Graphics templates that you can share via Creative Cloud Libraries.
With your sequence already open in the Timeline panel, click Graphics in the workspace bar at the top of the screen or choose Window > Workspaces > Graphics from the main menu.
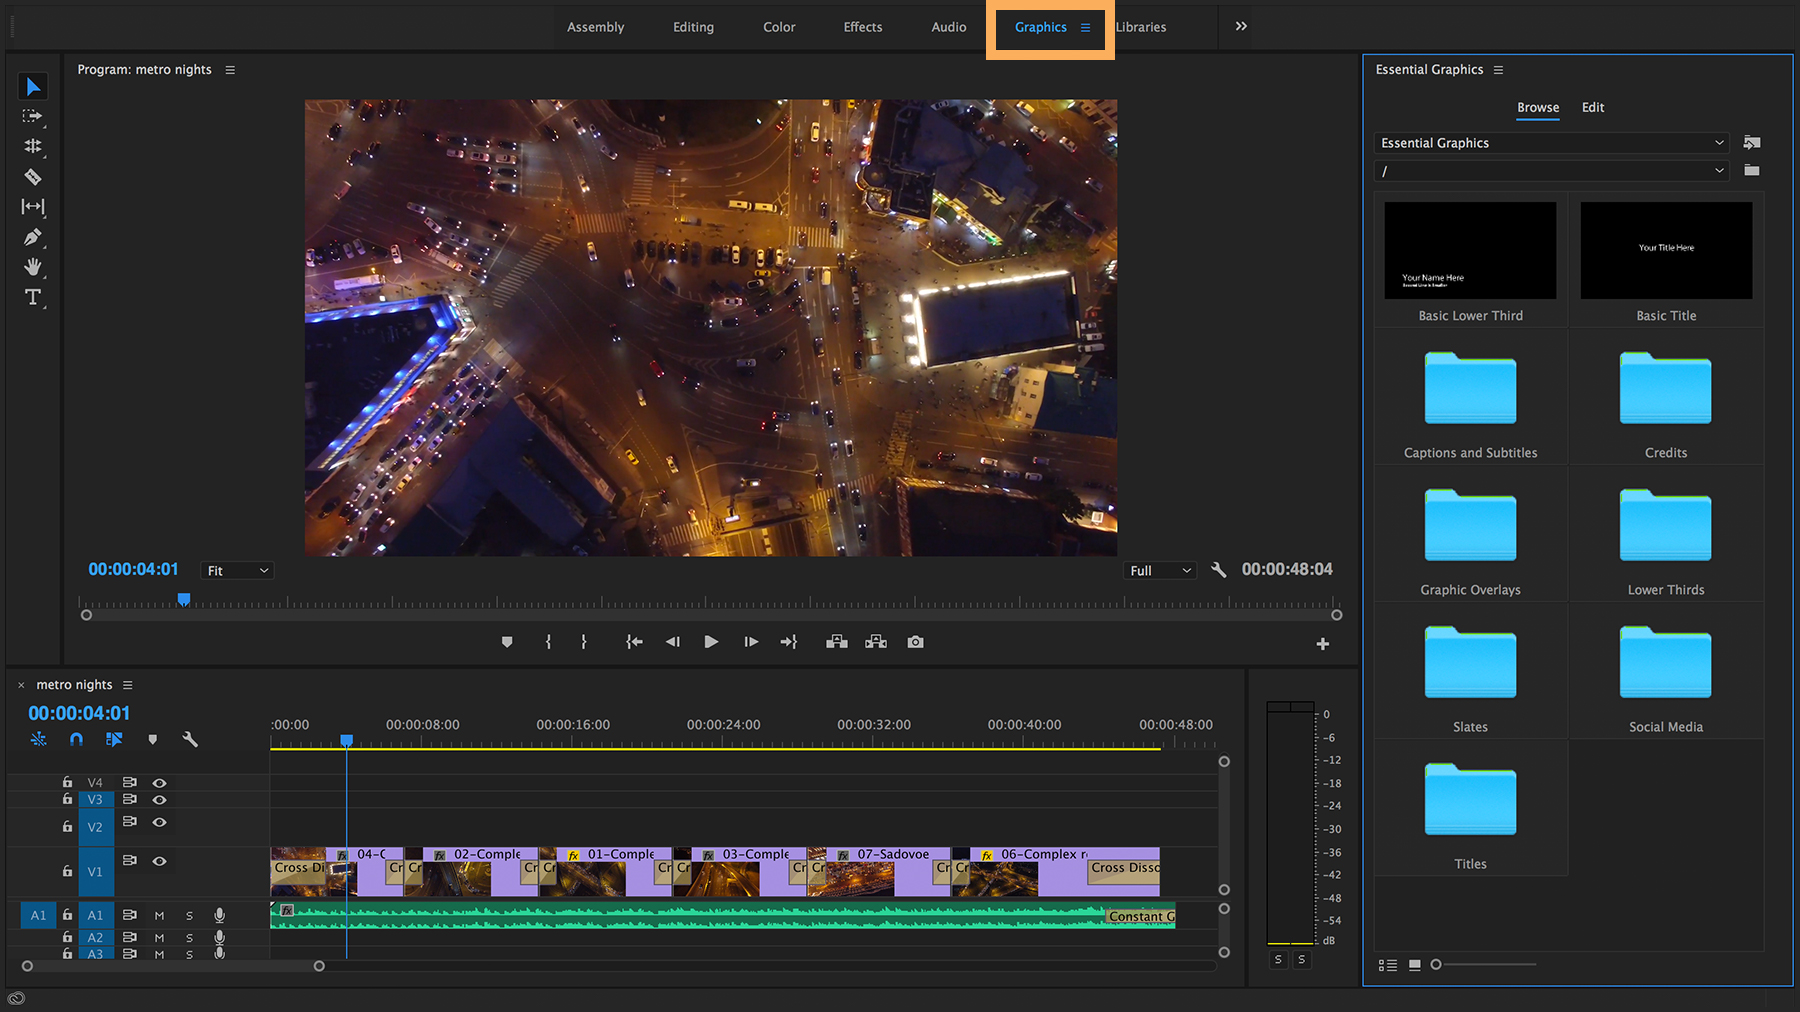
Browse in the Essential Graphics panel to the Titles folder and double-click to open the folder. Drag the Film Presents Motion Graphics template onto a video track in the Timeline, where it becomes a clip with the default duration. Adjust the clip’s timing and duration to suit your footage. You may wish to add a transition to improve the way the title appears in your sequence.
Note: Some templates use Adobe Typekit fonts that you may not have installed. Check the appropriate font in the Resolve Fonts dialog box to sync it with your system.
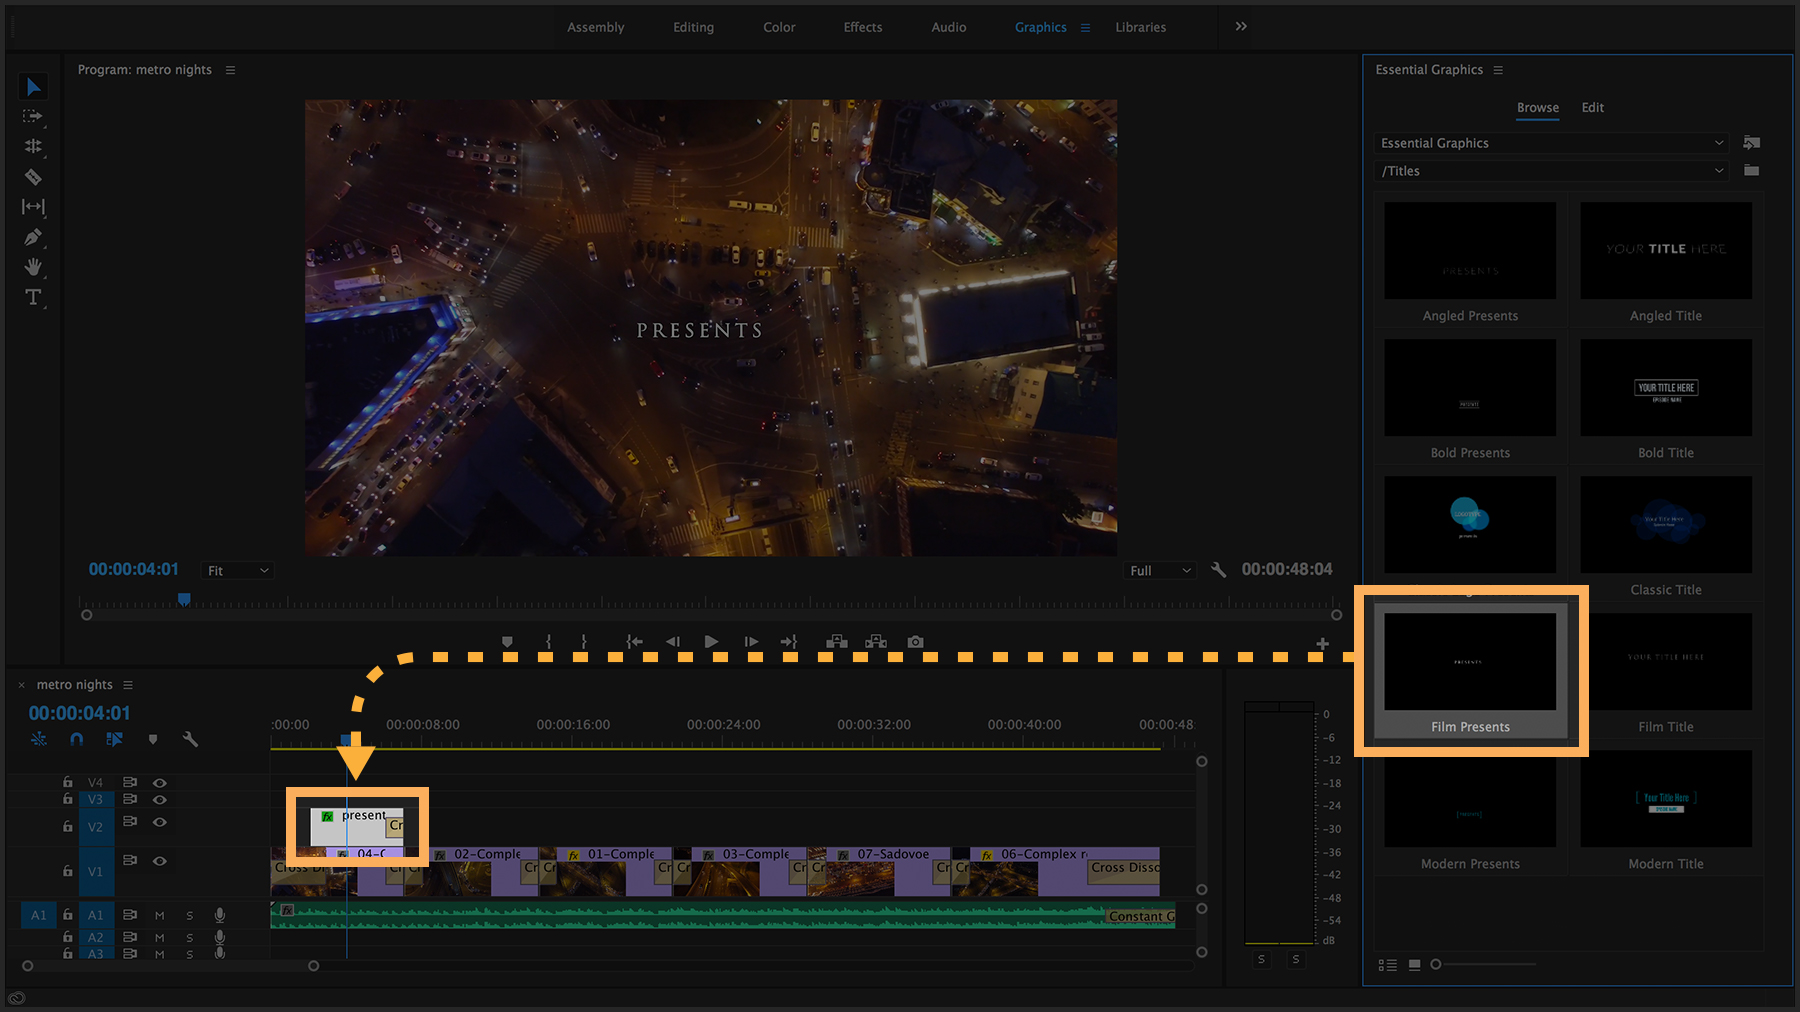
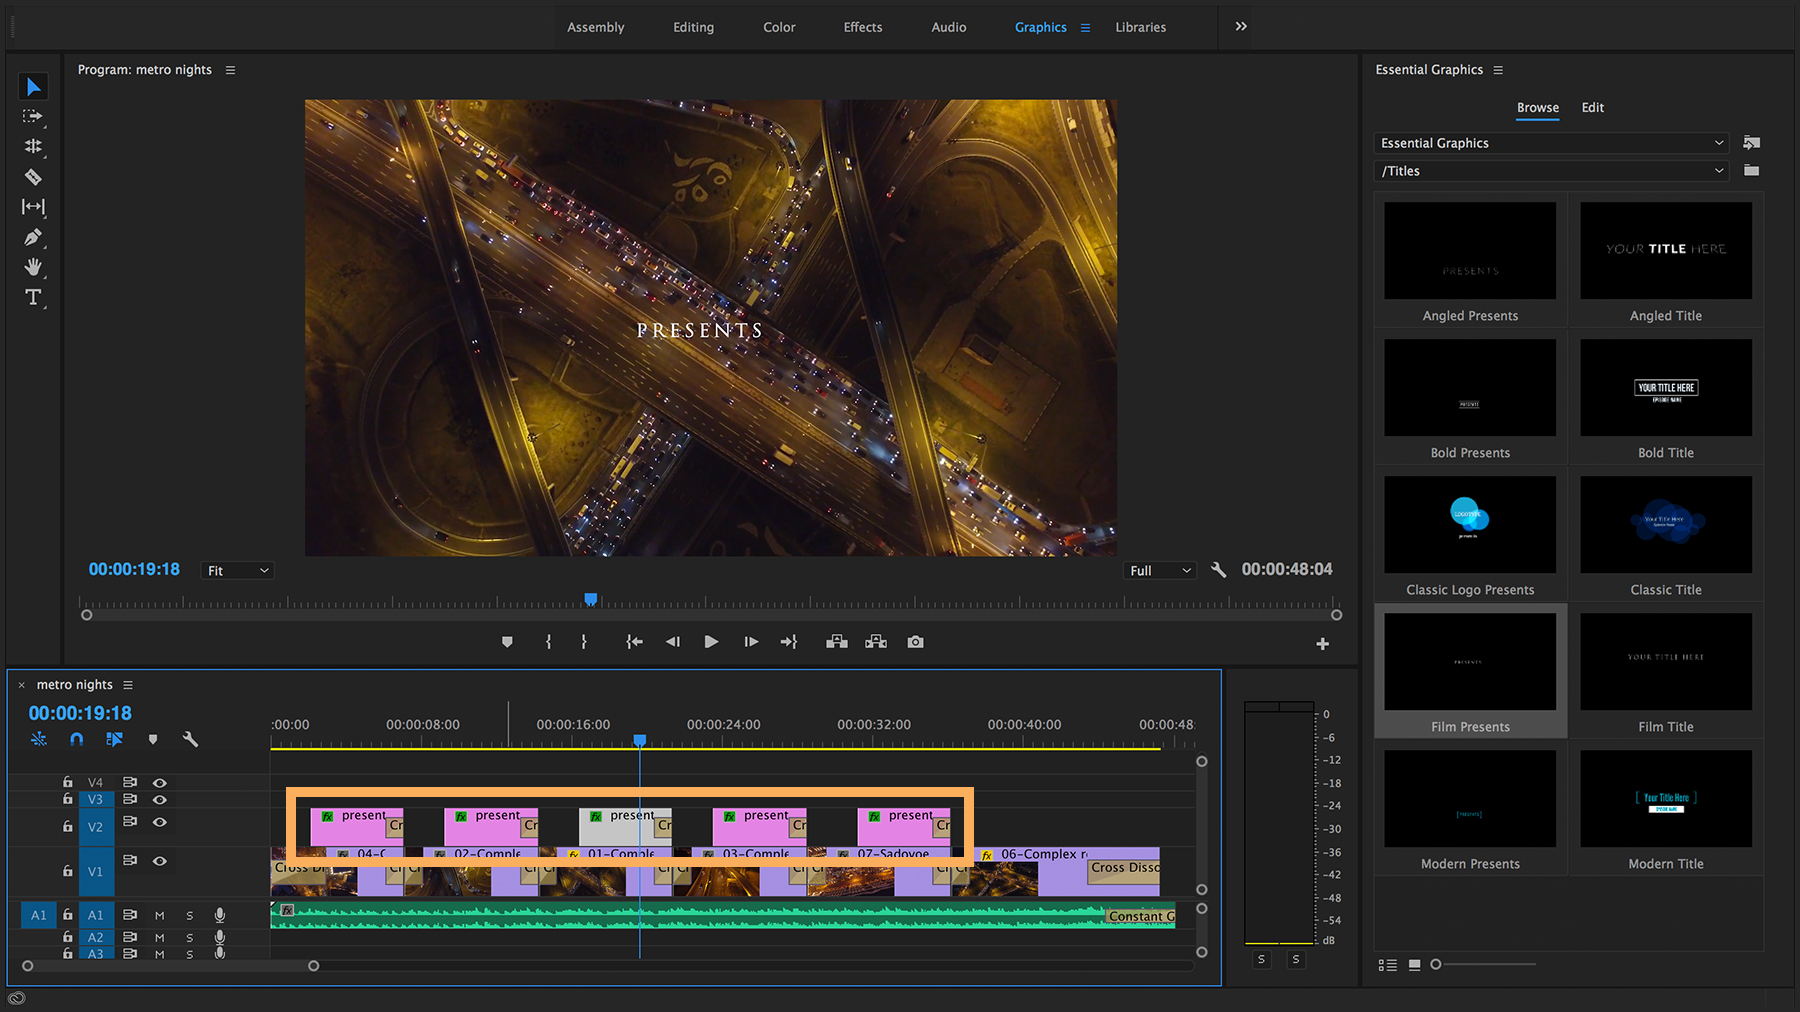
To add credits in the same style throughout your project, Alt-drag (Windows) or Option-drag (macOS) the clip to duplicate it elsewhere in your sequence.
Select a title clip in your sequence. It will appear in the Program Monitor. Select the Type tool and click once on the sample text so that you see a red bounding box. Now you can edit the displayed text. Do this for all your titles.

With a title clip already selected in your sequence and the Selection tool active, click once on the text in the Program Monitor so that you see a blue bounding box. Select the Edit tab in the Essential Graphics panel and then, in the Text section, change the typeface to a different font or font style. Adjust the font size slider to increase or decrease the size. Change other text properties as you wish.

When you’re satisfied with your text styling, open the Master Styles submenu and choose Create Master Text Style. Give the new master style a name and click OK.

Now you can open other title clips in the Program Monitor and apply the master style you just created by choosing it in the Essential Graphics panel. You need to make the text active in the Program Monitor first in order to see its properties displayed in the Essential Graphics panel.

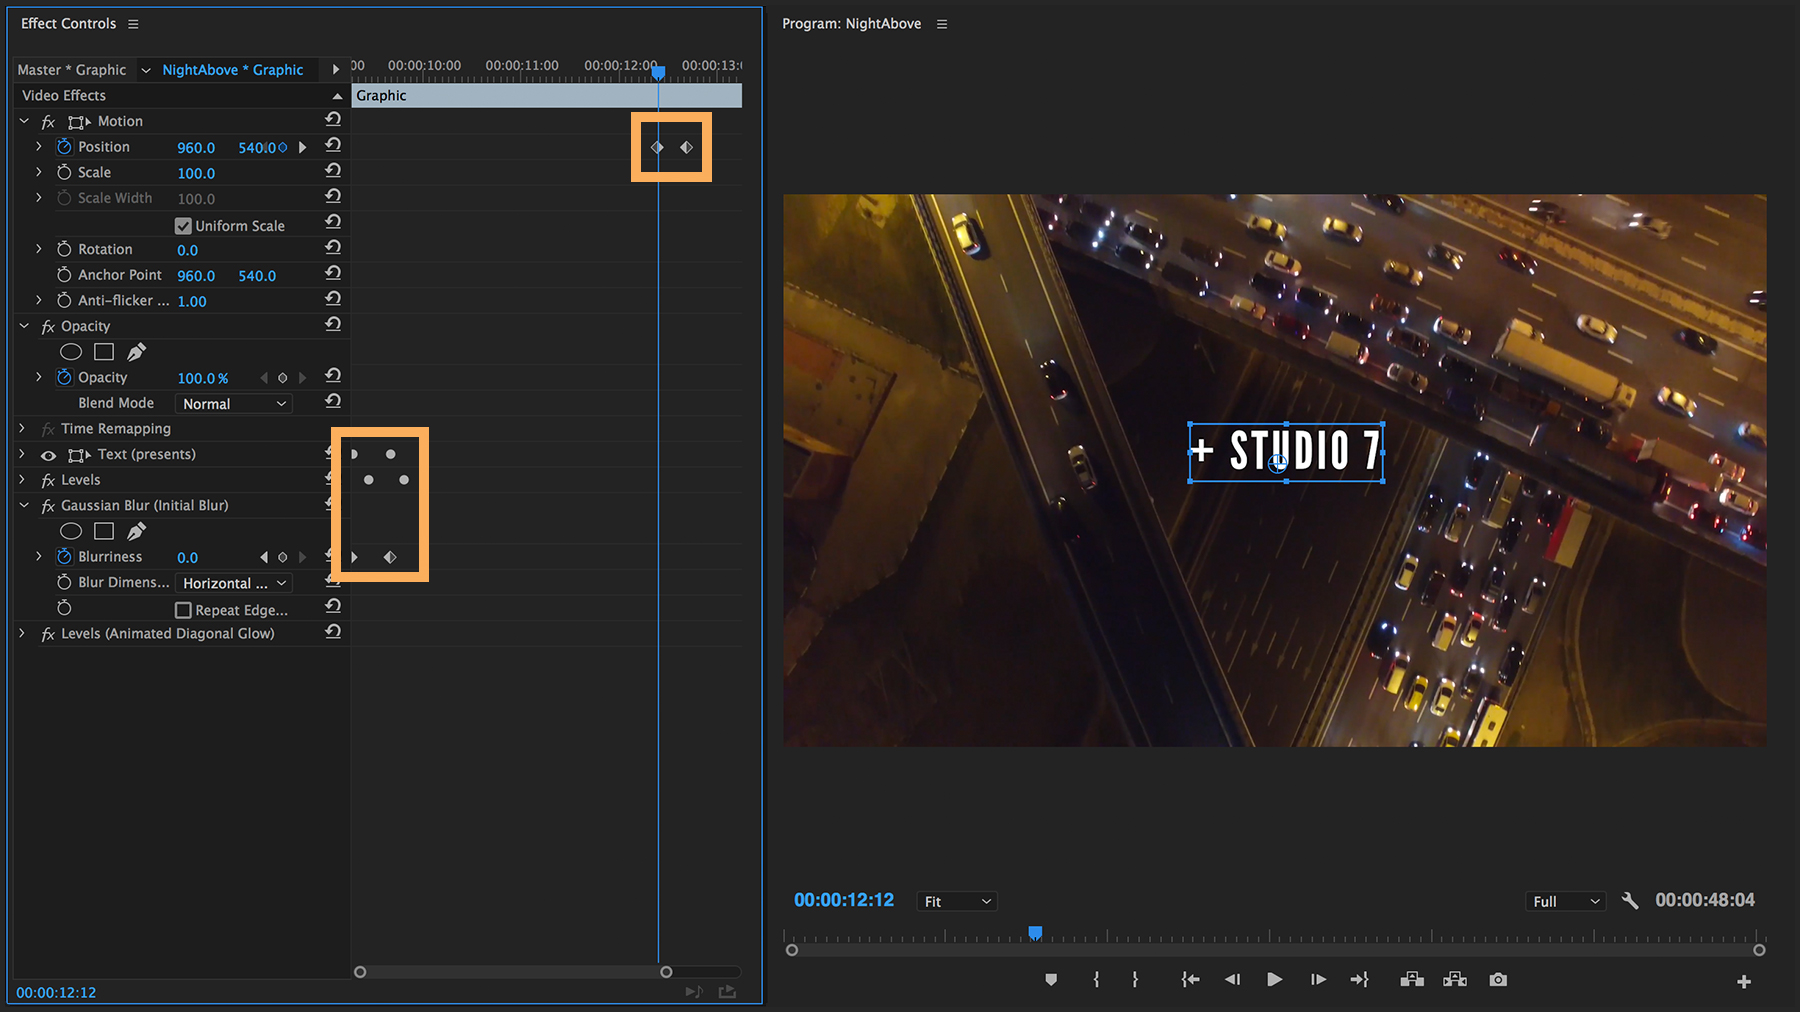
To enhance your title visually, feel free to animate the parameters of effects you apply to a title clip — for example, animate the position and size using keyframes — or add a Cross Dissolve effect at the beginning or end of a clip. The templates that ship with Premiere Pro employ creative uses of these effects: Convolution Kernel, Fast Color Corrector (Blue Lens), Gaussian Blur, or Levels (Animated Diagonal Glow).
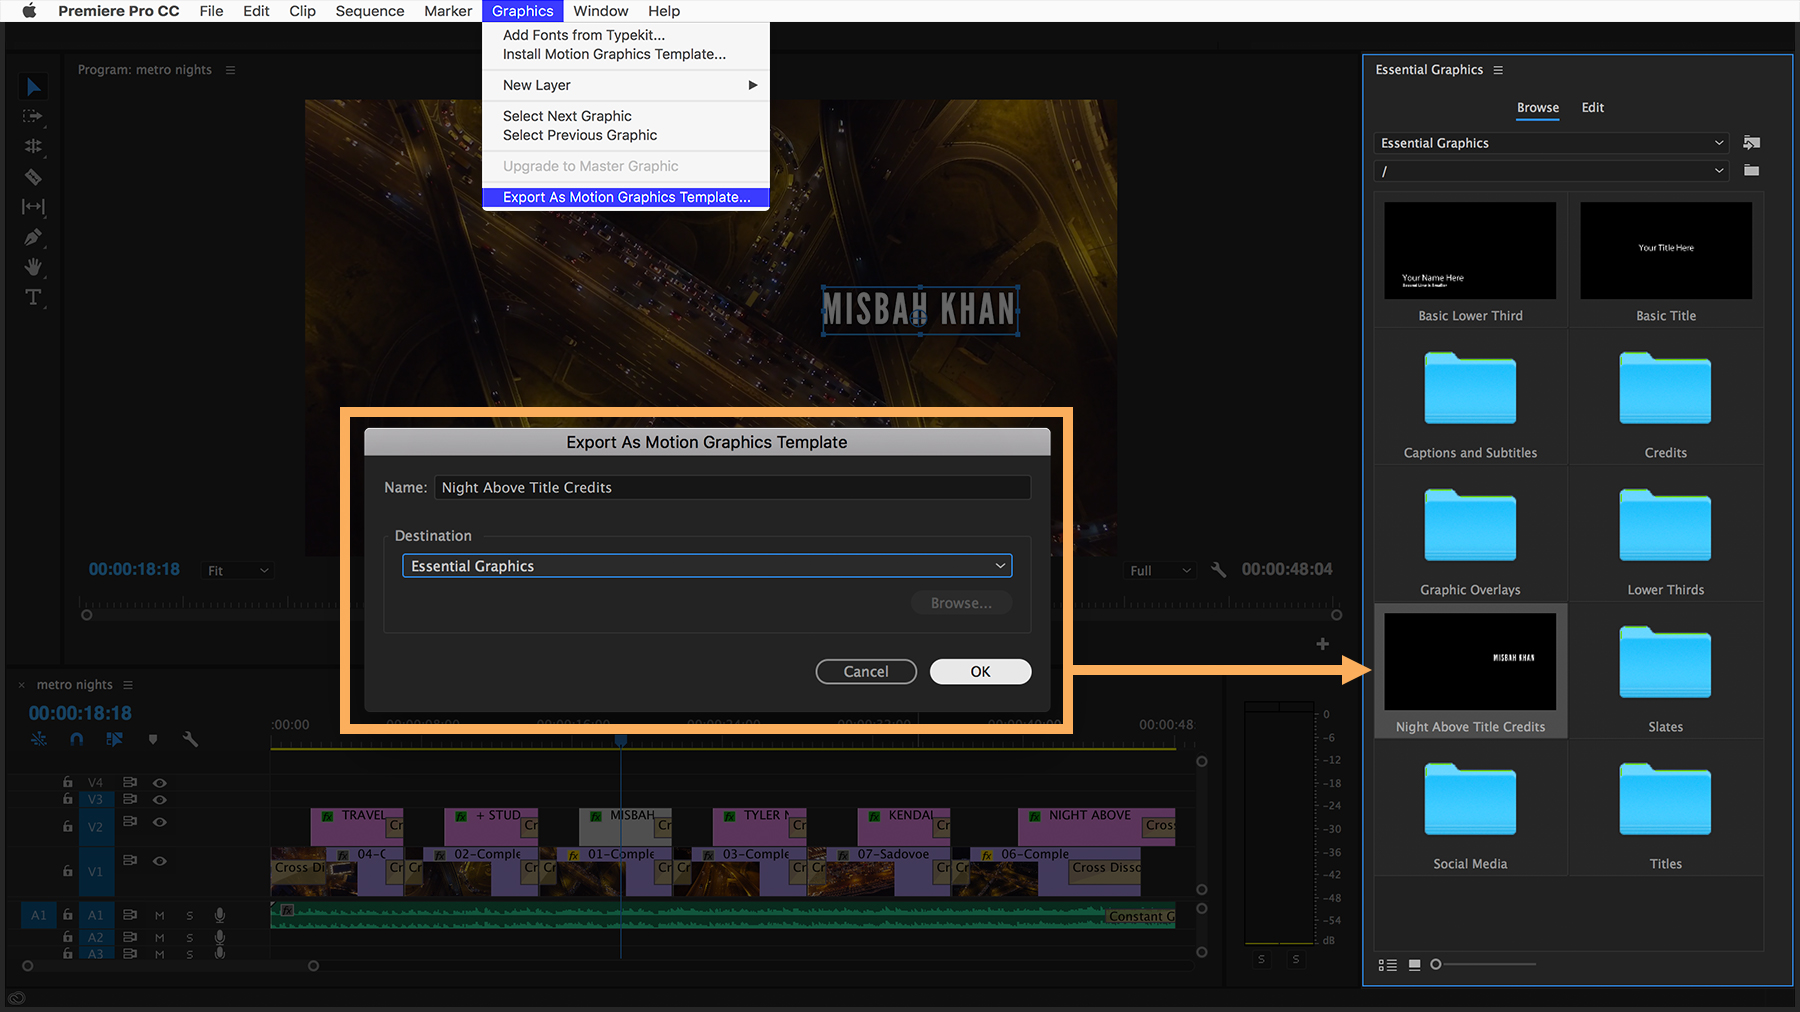
Select a title clip in your sequence. Select Graphics > Export As Motion Graphics Template from the main menu. Rename the template if you wish and choose a destination, whether within the Essential Graphics panel, on your local drive, or in your Creative Cloud Library. Click OK. The template you export is now available for use in future projects and sharable with others via Creative Cloud Libraries. Access them later through the Essential Graphics panel or in your Library (under Motion Graphics Templates).
To learn about creating Motion Graphics templates in Adobe After Effects CC for use by editors in Premiere Pro, see Create Motion Graphics templates.
* Nguồn: Premiere Pro CC
Ý KIẾN THÀNH VIÊN