Adobe Photoshop Lightroom is now Adobe Lightroom Classic CC, with the same functionality and features. If you're looking for the all-new photography service, check out Lightroom CC.
Crop and straighten your photos in Lightroom Classic
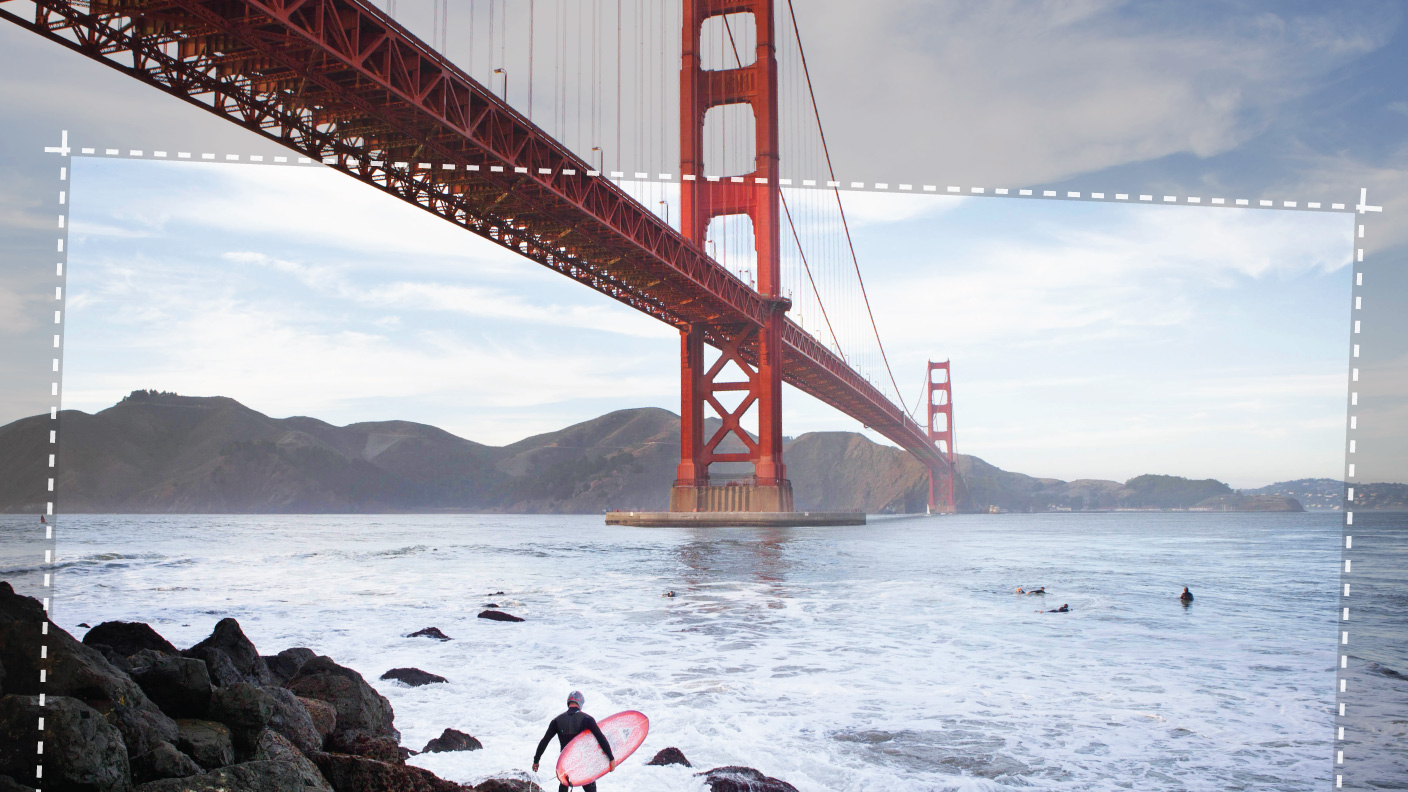
Fix tilted photos with alignment guides and crop them to specific sizes for picture-perfect results in Lightroom Classic CC.
What you'll need
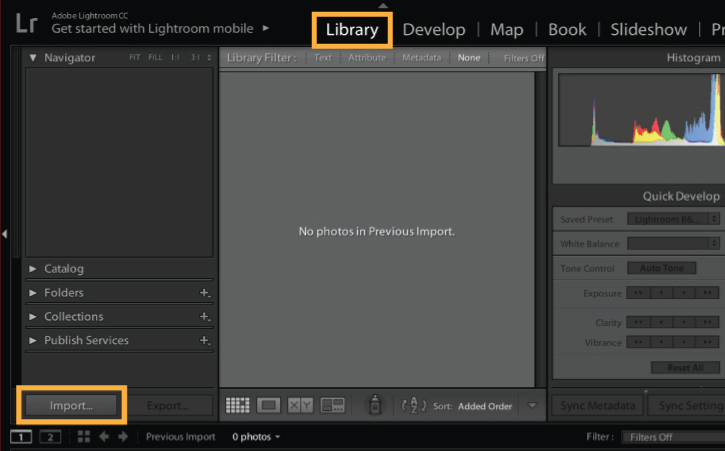
In Lightroom Classic CC, go to File > Import Photos and Video, or press the Import button in the Library module.
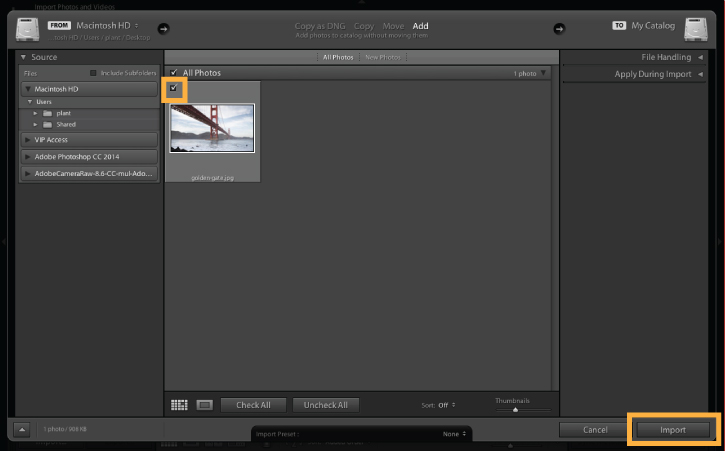
Browse to find your photo or the sample photo provided using the Source panel to the left of your workspace. Check the box at the top-left corner of the photo thumbnail to select it for import. Press the Import button at the bottom right corner of your workspace.
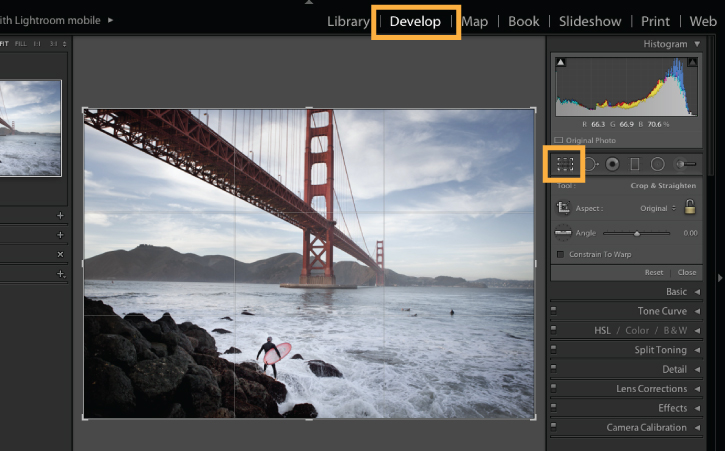
Click the Develop tab at the top of your workspace. Locate and select the Crop & Straighten tool icon in the toolbar, which opens the options for the tool. Alternatively, press "R" on your keyboard to open the Crop & Straighten tool options.
To straighten a photo, hover your cursor just outside the edge of the photo until your cursor changes to a curved double-ended arrow. Click and drag to rotate the photo within the frame.
For the sample photo, rotate the photo until the horizon line is level. Use the overlying grid as a reference to help make the horizon level.
Once you have straightened your photo, release the button on your mouse. Click Reset if you would like to start over again with your original photo.
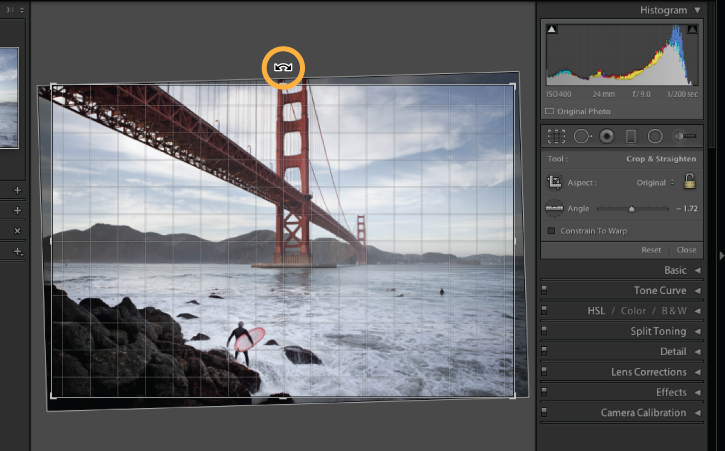
Click one of the corners of the photo and drag it to resize the crop area. You can hold down the Shift key on your keyboard to constain the crop area to a specific dimension. Release your mouse button.
Next, click and drag the photo within the crop area to select which part of the photo to keep.
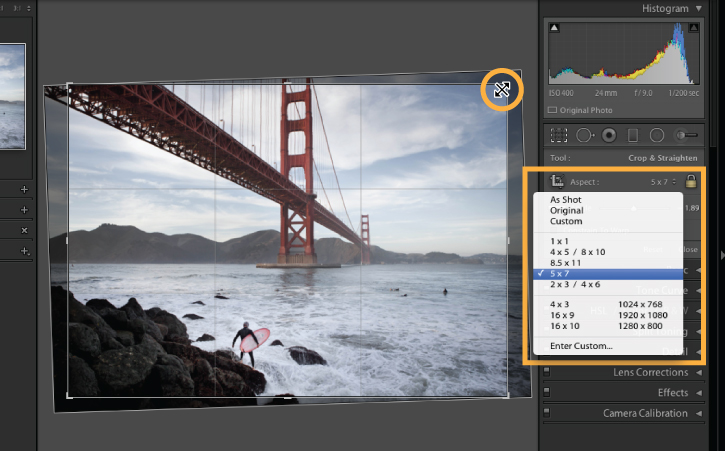
Note: By default, you can resize the crop area freely. If you use the Aspect dropdown menu, you can select a standard-size ratio for the crop, such as 1x1 or 5x7. You can also constrain the dimensions of the original photo or enter a custom ratio. To resize the crop area freely again, click the lock icon to the right of the Aspect dropdown menu.
For the sample photo, select the 5x7 aspect ratio from the dropdown menu, and center the Golden Gate bridge within the crop area.
When you're finished cropping your photo, click Done at the bottom of the workspace.
The Crop & Straighten tools are often the first step many photographers use when editing photos in Lightroom Classic CC. Use these options to crop a photo for Instagram, straighten crooked photos, or prepare photos for printing.
When you're finished, export your photo by choosing File > Export.

* Nguồn: Lightroom Classic
Ý KIẾN THÀNH VIÊN