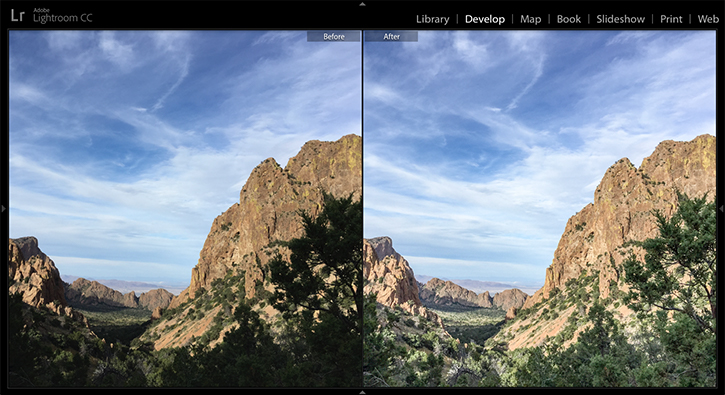
With Lightroom Classic CC as an indispensable part of your photo workflow, you can easily fix common exposure and color issues with these quick adjustments.
Discover the possibilities for enhancing your photos in Lightroom Classic
Discover some of the amazing ways that you can edit and enhance your photos using Adobe Lightroom Classic CC.


Did your camera underexpose or overexpose a scene? A quick adjustment with the Exposure slider may be all you need.
If a photo is too dark overall, drag the Exposure slider to the right to lighten it.
If a photo is too light overall, drag the Exposure slider to the left to darken it.

Sometimes a photo will look flat or dull straight out of the camera. Try these techniques to add contrast to a dull photo in Lightroom Classic CC.
Drag the Contrast slider slightly to the right to increase overall contrast.
Drag the Clarity slider to the right to give more punch to the midtones.
Add even more contrast by dragging the Blacks slider to the left to make the darkest tones deeper and richer.

Are the colors in a photo too bland? Increase color intensity with the Vibrance or Saturation slider.
Drag the Saturation slider to the right to intensify all the colors in a photo. If the effect is too strong, try the Vibrance slider instead.

Lighting conditions in a scene can fool your camera’s white balance controls, adding an unwanted color cast to a photo. Use the Lightroom Classic CC White Balance controls to make the colors in your photo more realistic.
Choose from White Balance presets or drag the Temperature and Tint sliders to achieve a more natural balance of colors.
Or experiment with the White Balance controls to give a photo a creative color look.

Save time by applying the same adjustments to other photos shot in the same conditions. In Lightroom Classic CC on your computer, adjust one photo. Then select additional photos in the filmstrip, and click the Sync button. Select the settings you want to synchronize, and click Synchronize to apply the same settings to multiple photos at once.
You can also use the Previous button to apply selected settings from the last opened photo to the current photo.
When you include Lightroom Classic CC in your photography workflow, you can rely on basic adjustments like these to make exciting images from photos that may not look perfect straight out of the camera.

If a scene is too wide to fit in a single shot with the gear you have with you, take multiple, overlapping photos to capture the entire view and leave it to Lightroom Classic CC to stitch them together into a stunning panorama.
Select your shots in the Library module. Then go to Photo > Photo Merge > Panorama. In the Panorama Merge Preview window, select the projection method Lightroom Classic CC uses to merge the photos. Check Auto-crop to crop away any white borders around the panorama, or drag the Boundary Warp slider to preserve the entire image. Then click Merge.

* Nguồn: Lightroom Classic
Ý KIẾN THÀNH VIÊN