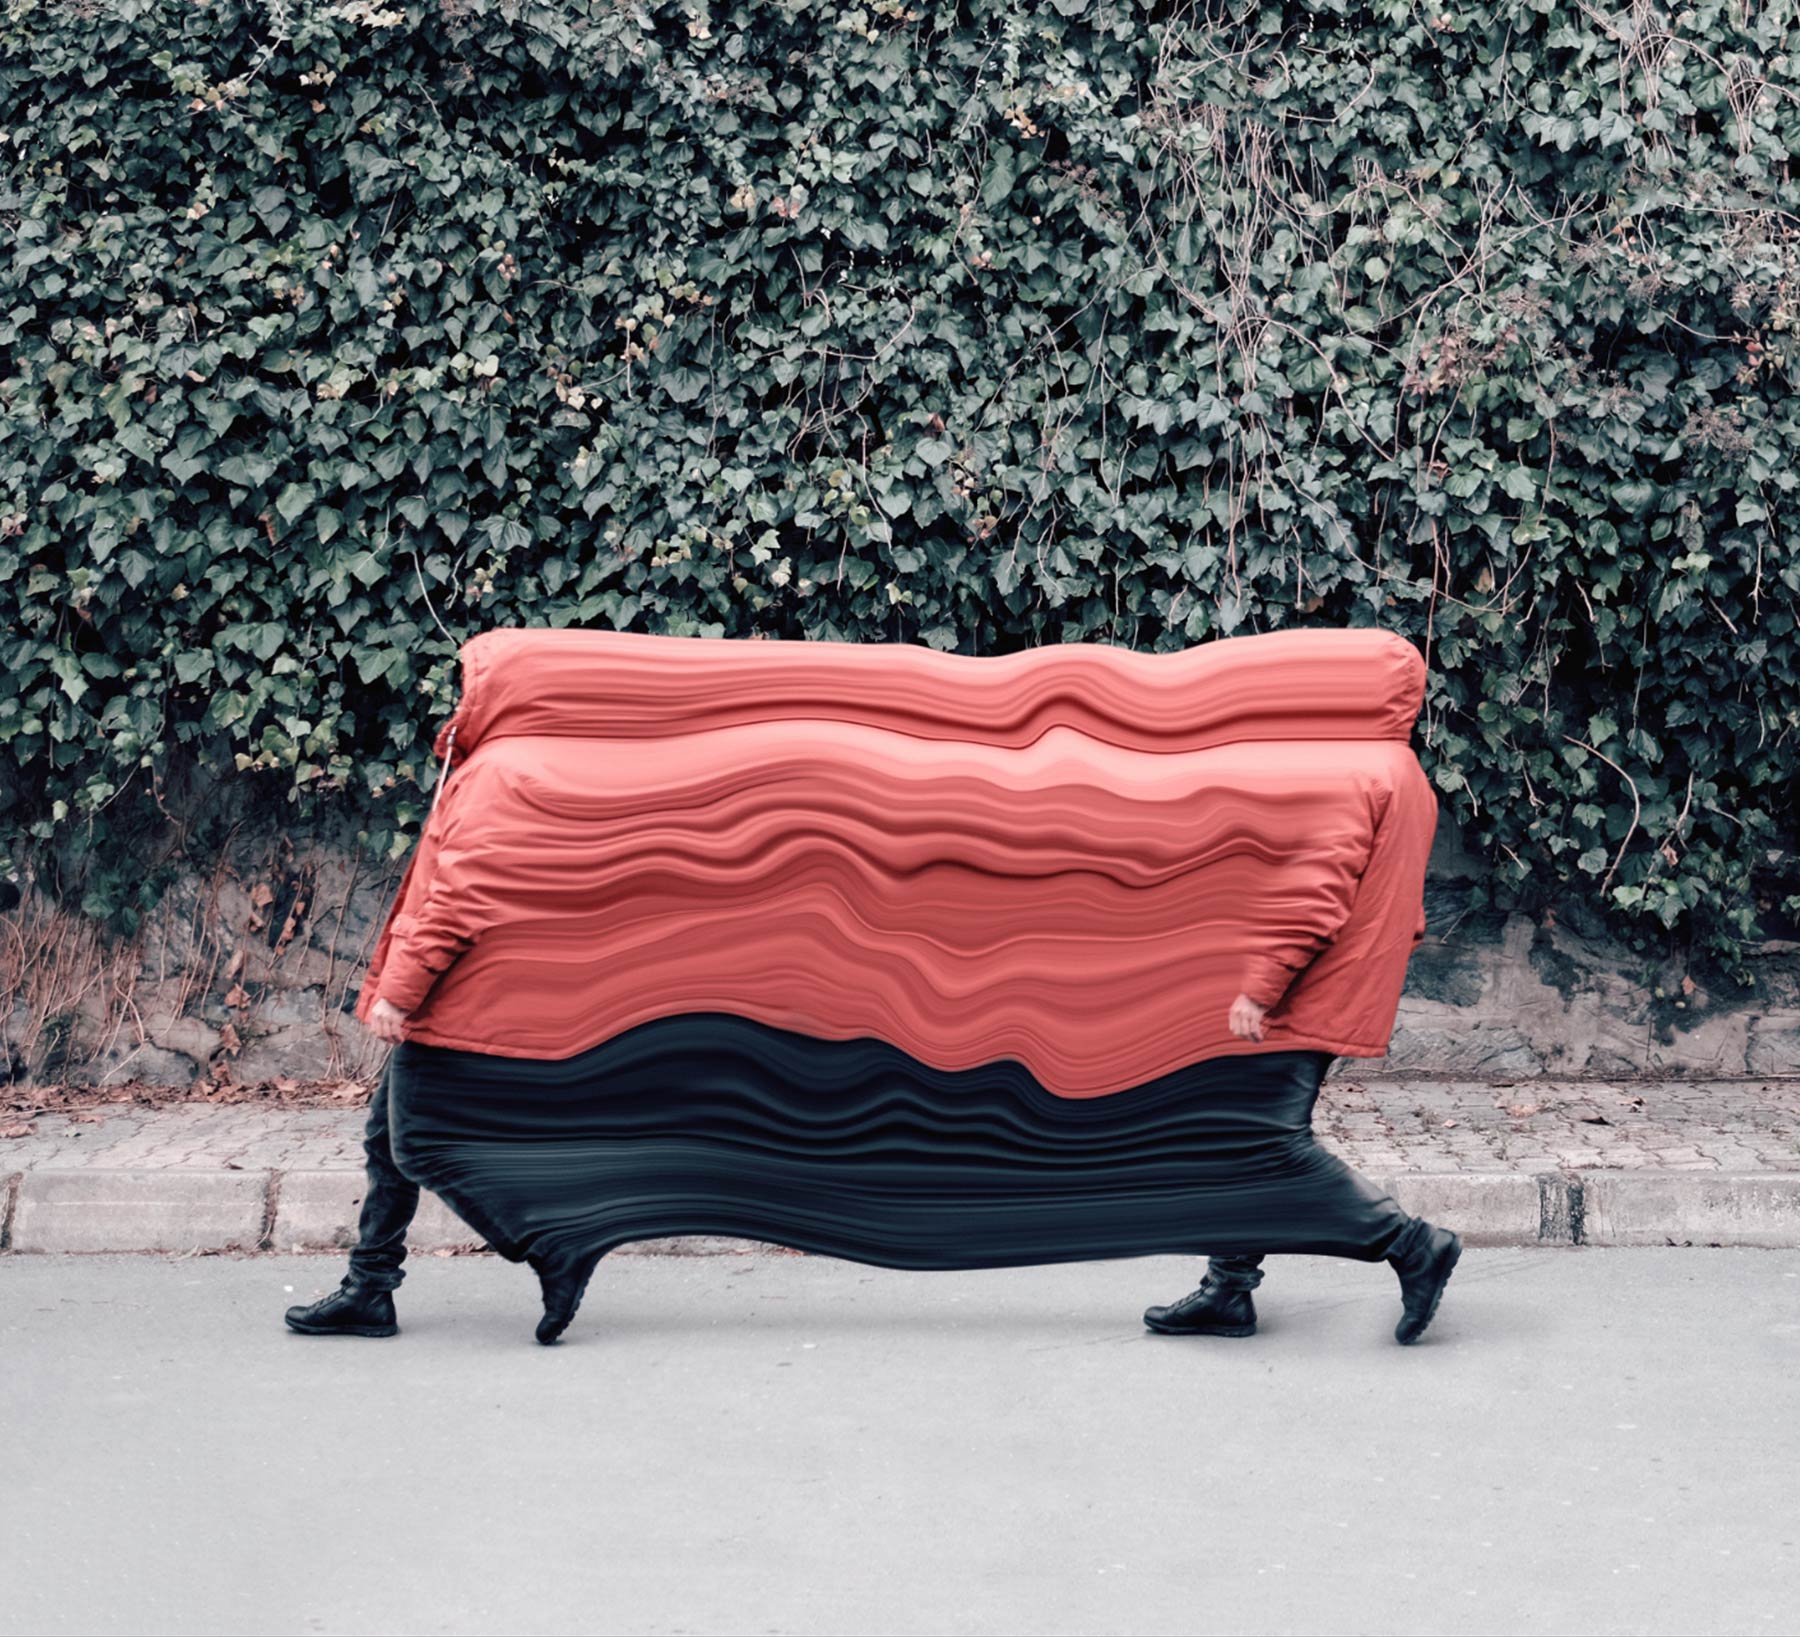
Before Şakir can simulate the effect of movement in the static image, he sets the stage by duplicating the person in the original photo. To do this, he uses the Pen tool to trace the person, copies the
selection (Edit > Duplicate), and drags the “extra” person directly behind the original, with some space in between.
How Şakir Yildirim created “Crawler” in Photoshop CC
Turkish-based artist Şakir Yildirim blurs the lines between photography and design as he explores surreal takes on everyday life in his “Crawler” series. Here we see how a moment captured in time refuses to stand still, thanks to the Liquify filter and Şakir’s imagination.

Şakir then lays the foundation to create the effect of motion. He uses the Marquee tool to draw a narrow rectangle, isolating the back of the jacket. He copies that rectangular selection to a new layer, and then
stretches it (Edit > Transform > Scale) to connect to the person in the back.

Still working on the distortion layer, Şakir uses the Warp tool (Edit > Transform > Warp) to drag the handles and line up the edges of the distortion with the subject in the photo.

Şakir is careful to place everything on a separate layer in order to apply effects to different parts of the image. At this point in the project, Şakir is ready to liquify the jacket on the person in the front. To do so, he duplicates the front person to a new layer. He then moves the person above the jacket stretch layer.

In the most time-consuming part of the project, Şakir creates the effect of liquified movement through repeated actions of creating layers and applying and fine-tuning the liquify effect. He selects part of the
image to liquify. Then, he uses the tools in the Liquify filter (Filter > Liquify) to drag and pull from the subject to create the desired effect.
Tip: Şakir mostly uses the Forward Warp tool to create the liquify effect. When he wants to protect portions of the image from being liquified, he uses the Freeze Mask tool. Throughout this process, Şakir uses the Transform options to resize and shape the selections as necessary.

Şakir uses the Eraser tool to blend the noticeable edges where the liquify effect has been applied to separate parts of the image. To do this, he selects a layer that needs blending, selects the Eraser tool, sets the size, and adjusts the hardness of the eraser edge to create a smoother blend.


Şakir uses a variety of tools to create a custom look for the overall composition. He adjusts exposure, clarity, hue, and sharpening with Camera Raw filters and adds a realistic shadow with a Gaussian Blur. To really set the mood, Şakir applies Color Lookup and Selective Color settings before completing the scene with Auto Color, Contrast, Tone, and adjusted Curves.
To see more of his work, including other “Crawler” compositions, view his projects on Behance.


|
|
 |
About the artist: Şakir Yildirim uses Photoshop in surprising ways to transform the things he sees every day into a world of his own creation. He may work on a manipulation in Photoshop for hours and then purposely close it without saving his work, because experimenting with his art is more important than finishing. On the other hand, he may like what he sees and finalize his creation after just a few changes.
Şakir’s early studies in ceramics taught him the joy of creating. Now he finds inspiration in his travels and lets the chaos and uncertainty around him shape his visual language. Photoshop presents Şakir with a vast world in which to create art related to photography and design. His flexible approach allows him to work on projects ranging from logo and web design to photo manipulation, collage art, character design, GIF art, and pattern design. |
* Nguồn: Photoshop CC
Ý KIẾN THÀNH VIÊN