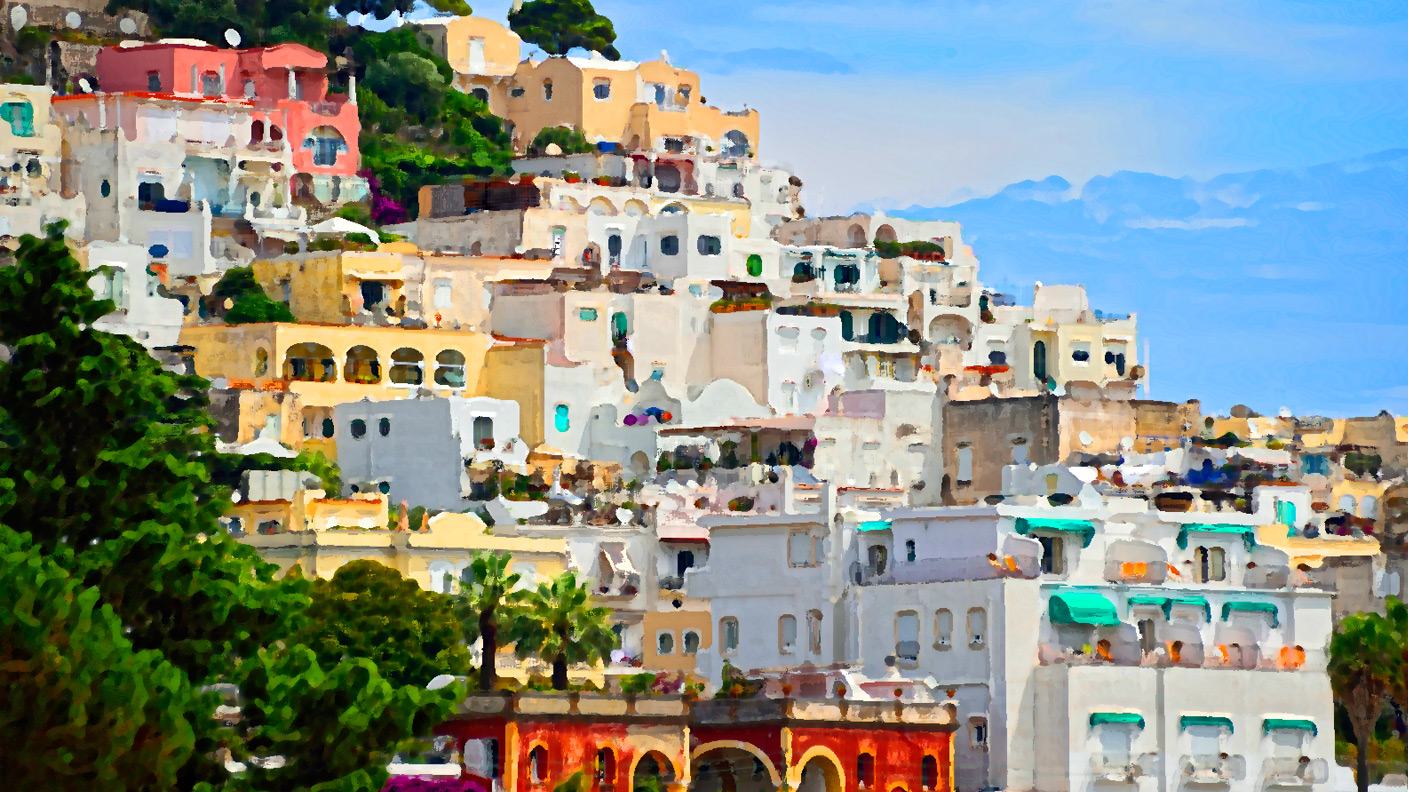
How to apply an artistic filter to your image from the Filter Gallery, and intensify the brightness of the colors to give the photo a hand-painted look.
Make a photo look like a painting in Photoshop CC
Learn how to apply artistic filters in Photoshop to create hand-painted effects.

What you'll need
In Photoshop, go to File > Open... and select a photo from your computer. If you're following along with the sample asset, select “turn-photo-into-painting.jpg.” Click Open.
If you're using one of your own photos, use a photo of a landscape or a still life to get the best results.

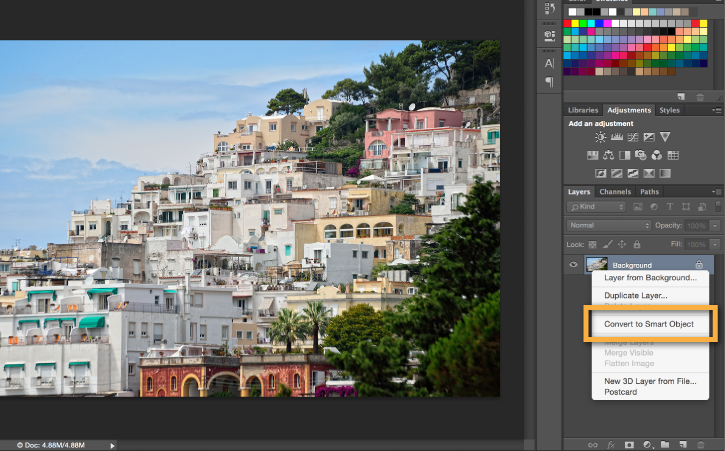
Locate the Layers panel at the lower-right corner of your workspace. If you don't see it, go to Window > Layers. Right-click the "Background" layer and select Convert to Smart Object.
Converting to a Smart Object allows you to go back and edit the artistic filter that you will apply in the next step. This is called a "nondestructive edit" because it preserves the original photo, even after applying effects.


Select the Dry Brush filter from the Artistic folder, to the right of the photo preview.
On the right of the window are the filter options. For the sample photo, set the Brush Size to 7, the Brush Detail to 9, and the Texture to 1.
Tip: At the lower-left corner of the window are the preview view options for the filter. Click the percentage drop-down menu and select Fit in View to preview the entire image.
When you're done, click OK.

Locate the Adjustments panel above the Layer panel to the right of the workspace. If you can't see it, go to Window > Adjustments.
Click the Hue/Saturation adjustment in the second row of icons.
In the Properties panel that appears, use the Saturation slider to set the saturation to +65. This increases the intensity of the colors in the photo, emphasizing a painterly look. When you're done, click the Properties tab title at the upper-left of the panel to close it.

As was mentioned in step 2, the edits you have applied are non-destructive, which means that you can go back and edit them from the Layers panel.
To edit the Saturation adjustment, double-click the icon to the left of the Hue/Saturation 1 layer in the Layers panel and the Hue/Saturation sliders become available to you.
To edit the Dry Brush filter, double-click the Filter Gallery under Layer 0 in the Layers panel and the Filter Gallery opens for further edits.

The result of applying just two effects is a bright, stylized image that has a hand-painted appearance.
Try to use this technique on different photos, or experiment with other filters from the Filter Gallery. Apply the Rough Pastels filter on a photo with a large area of colors to create a textured effect, or use the Colored Pencil filter to turn a portrait into a sketch image.

* Nguồn: Photoshop CC
Ý KIẾN THÀNH VIÊN