This sample file has Adobe Stock images you can use to practice what you learn in this tutorial. If you want to use the sample file beyond this tutorial, you can purchase a license on Adobe Stock. Check out the ReadMe file in the folder for the terms that apply to your use of this sample file.
Select hair in a photo in Photoshop CC
Editing photos with tousled or windblown hair doesn’t have to be difficult. Use the Select and Mask workspace in Adobe Photoshop CC to make selecting hair easier.

What you'll need
Feel free to use our practice file, or use your own. Use the Lasso or Quick Selection tool to make the initial selection. We used the Lasso tool and left the edges of the hair outside the selection area — make sure you don’t include parts of the background in your selection. Then, click the Select and Mask button to enter the workspace where most of the work to finesse the hair selection will occur.

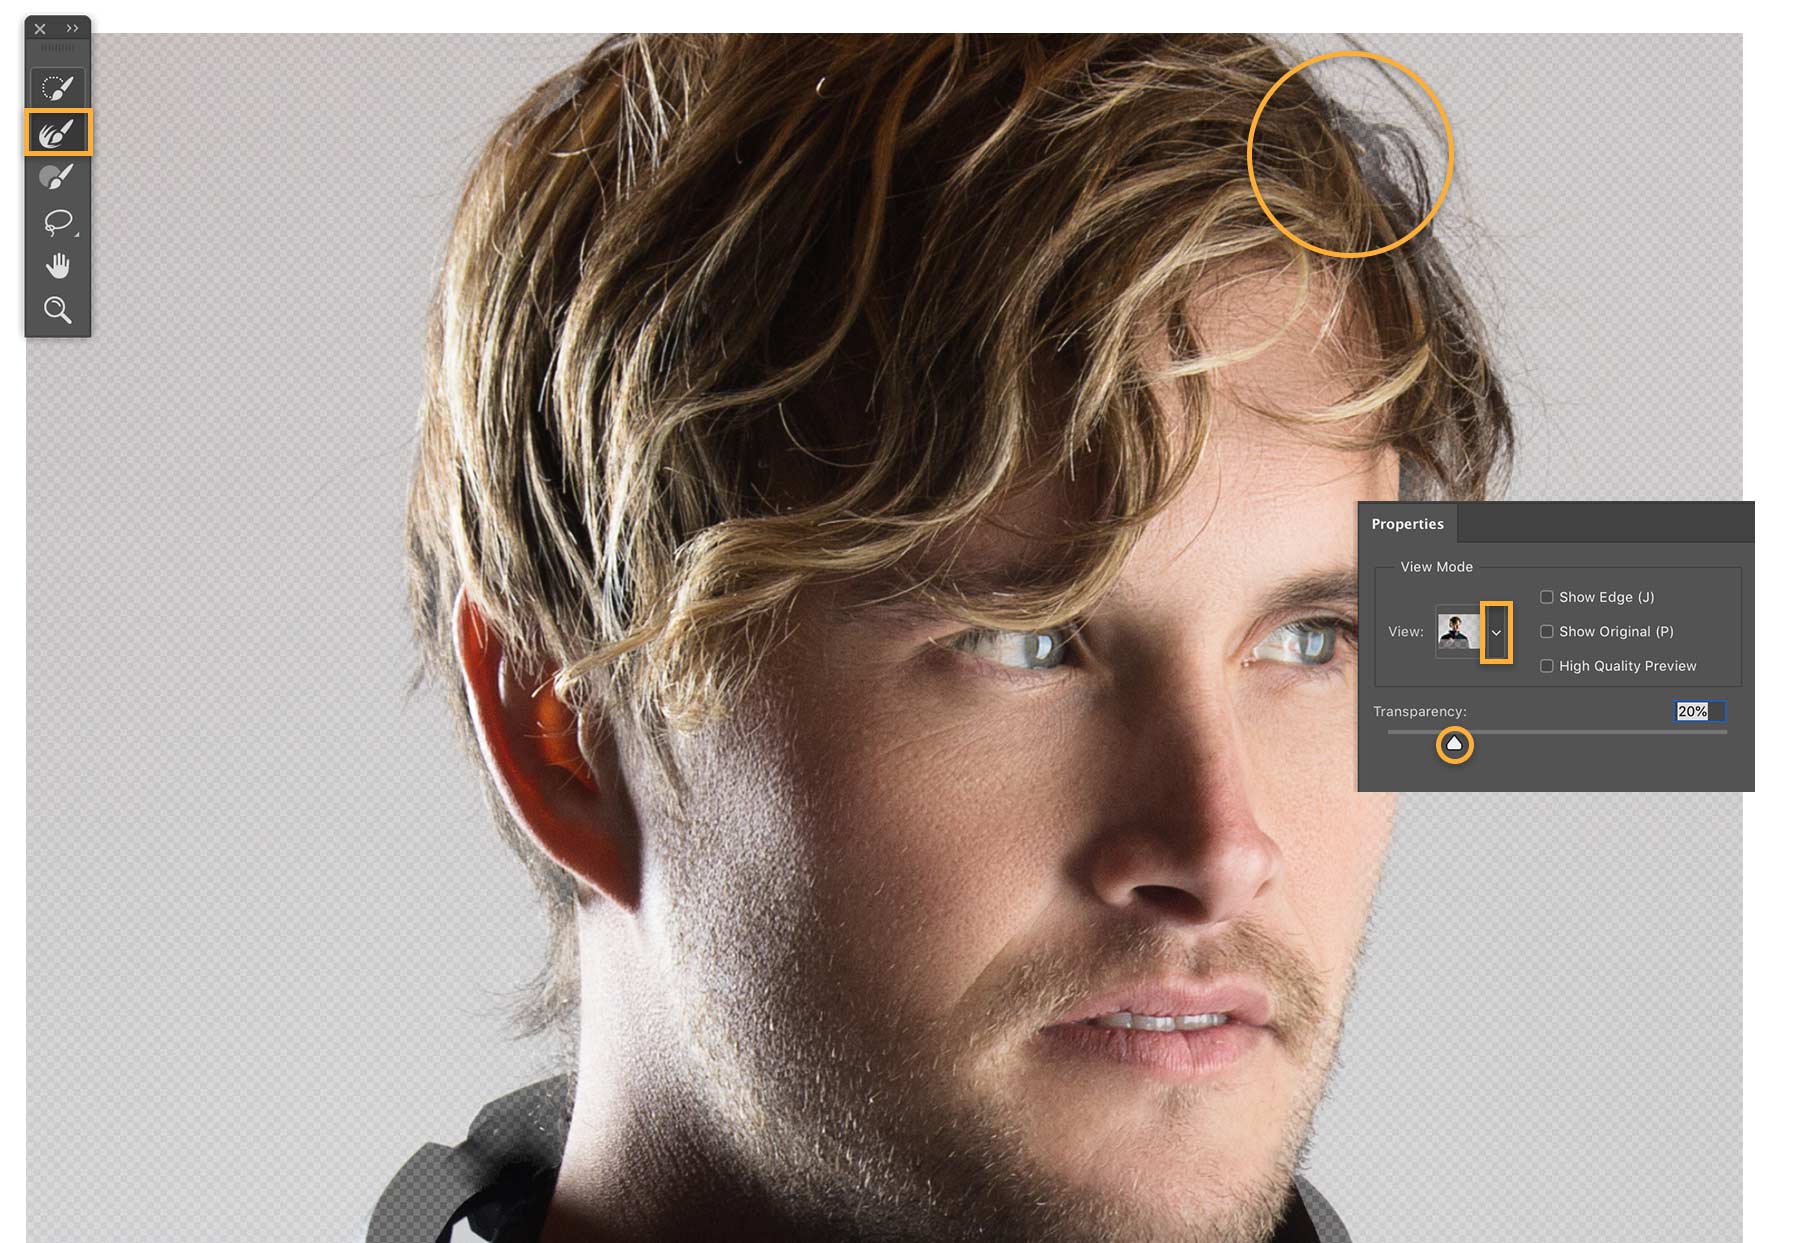
The Select and Mask workspace has multiple View Modes to help you see the edges of your selection. We used the Onion Skin mode and adjusted the Transparency setting to better visualize the areas we wanted to add to the selection. Choose the Refine Edge Brush, and then brush along the edges of the subject. As you brush, notice how the ghosted edges become part of the selection.

The Refine Edge Brush does a good job on the first pass. To make sure everything you want is selected, switch to the Overlay view mode. A red overlay appears over parts of the image that are not included in the selection. In the image below, part of the model’s hair and headphones were not picked up by the Refine Edge Brush. Let’s switch to the Quick Selection tool and brush over those areas to include them. When you’re finished, choose Output to > Layer Mask at the bottom of the Properties panel. Click OK.

Because we output the selection to a layer mask, Photoshop created a new layer in the Layers panel (Window > Layers). Notice the black-and-white mask thumbnail on the new layer. The white areas of the mask indicate the visible areas of the layer, the selection we just made in the Select and Mask workspace. The black areas are hidden. Drag the speaker image from your computer into Photoshop. Drag the handles to size the image and press Enter or Return to place it. Move the new image below the DJ layer.

The new background image shows through the hidden parts of the mask to create an entirely new composition.

Now you can capture the tricky edges of different hairstyles for use in a wide range of projects.
With Adobe Stock, you have access to more than 100 million high-quality, royalty-free images including photos, graphics, videos, and templates to jump-start your creative projects. Try Adobe Stock and get 10 free images.
* Nguồn: Photoshop CC
Ý KIẾN THÀNH VIÊN