Typekit is now Adobe Fonts.
Set a beautiful title in Illustrator CC
Design an eye-catching title for your next project.
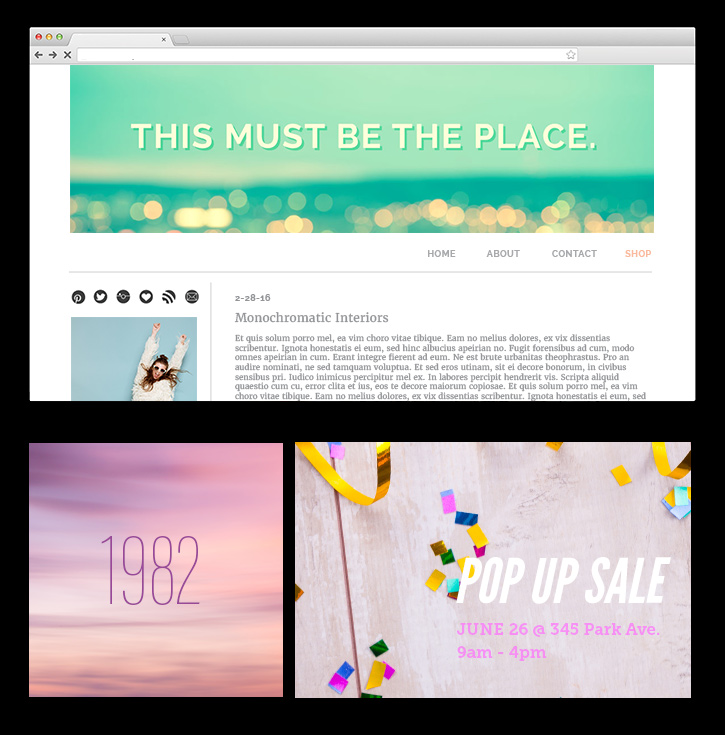
A title may be the first thing your viewer sees when they encounter your blog, annual report cover, presentation, social media graphics, and more.
Use this simple recipe to make a big impact at first sight: Choose a high-quality typeface, apply unique typesetting, and use an easy color matching technique.
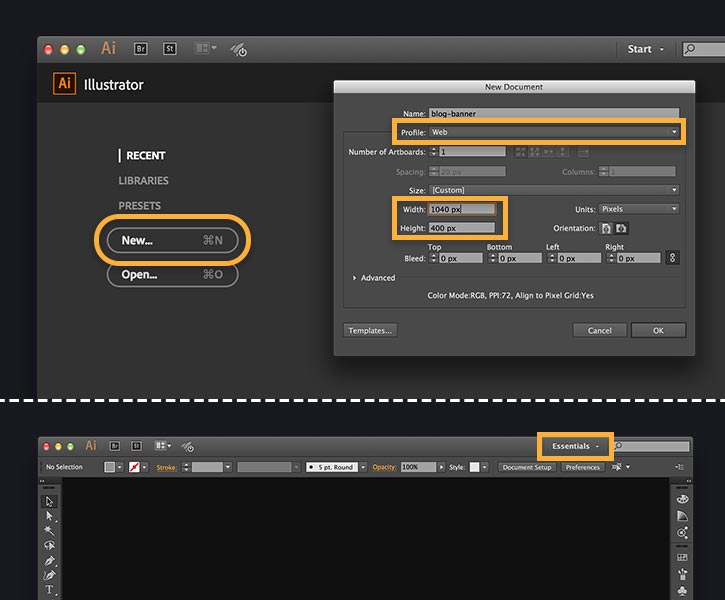
Click the New button on the start screen, or choose File > New.
For our sample project, we're designing a title for a blog header. Select these options: Profile: Web; Width: 1040 px; Height: 400 px and click OK
Tip: Choose the Essentials workspace in the Workspace Switcher menu to display all the panels you'll need for this project.
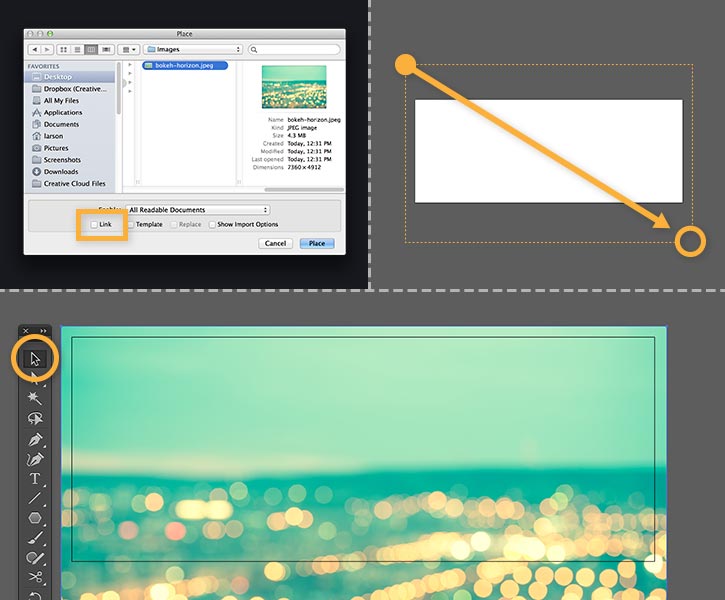
You'll start by adding a background image. Choose a simple texture or an image with open space for text.
Choose File > Place. Navigate to a photo you want to use. Uncheck the Link option and click Place. With a loaded cursor, click and drag so the photo covers the entire artboard. It's okay if your placed image exceeds the bounds of the artboard, we'll fix it later in the final step.
You can reposition the image after it's placed. Click the Selection tool in the Tools panel, and click and drag on the center of the photo.
Tip: Browse Adobe Stock to access royalty-free, high-quality images and graphics directly from Illustrator. You can download a free preview. See Use Adobe Stock with Creative Cloud Libraries to learn more.
Select the Type tool and click somewhere on the artboard to add an insertion point.
In the Control panel, type 60 pt in the Font Size menu and click the Align Center icon.
Type your title, then press ESC to exit the Type tool and automatically select your text.
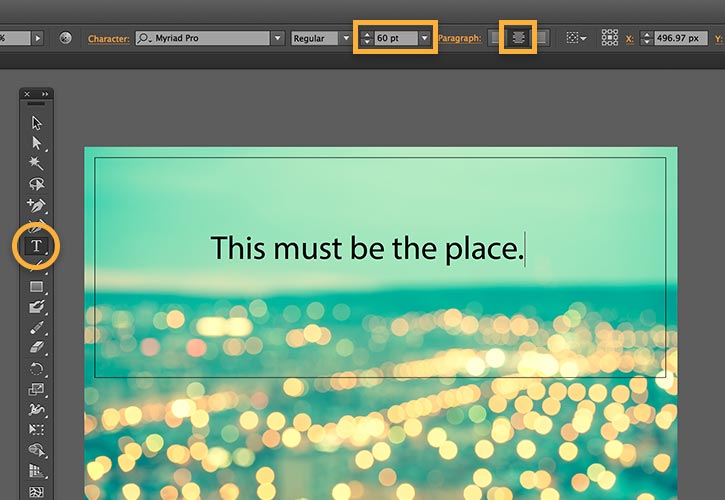
Next, you'll style your text.
In the Control panel, click the Font family pull-down menu and choose an existing font, or you can add new fonts using the Adobe Typekit Library available to Creative Cloud members. Click Add Fonts from Typekit to launch it in your browser.
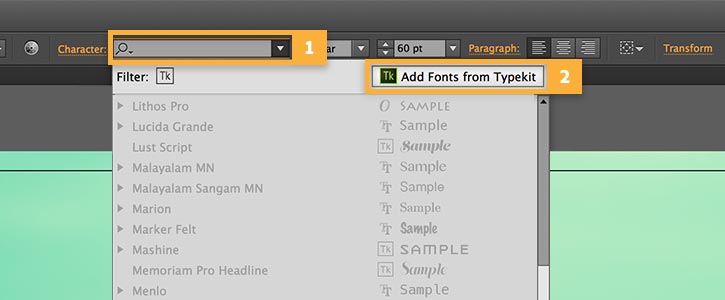
You can choose from thousands of high-quality fonts in the Typekit Library. Type your title in the sample text field to get a preview of how each font will look.
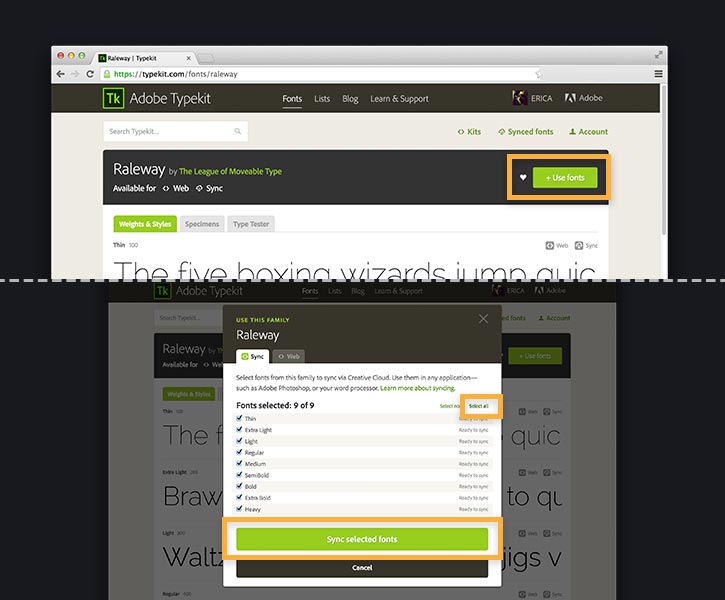
If you want to follow along, type Raleway in the search field and click + Use fonts. Choose Select All and click Sync selected fonts. The fonts will be added to your computer to use in your projects.
Note: Some fonts are only available with a paid Creative Cloud membership. See Getting started with Typekit and Creative Cloud for details.
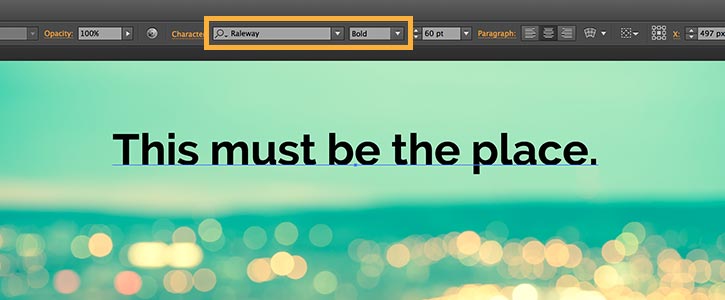
It's easy to create a unified color scheme by borrowing a color from the background image.
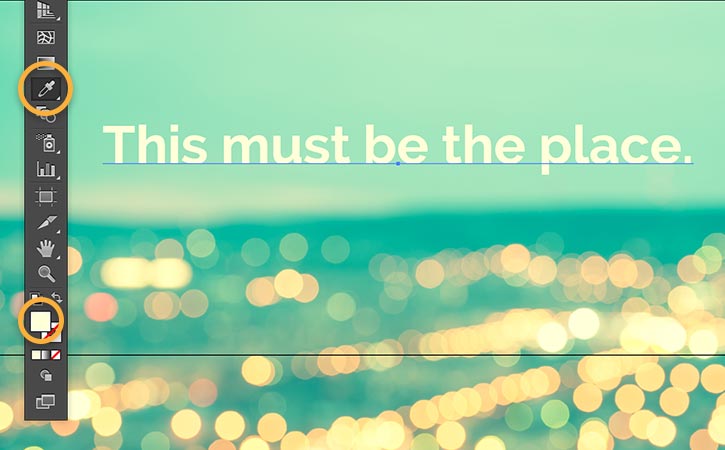
Select the Eyedropper tool and click anywhere in the image to sample a color and apply it to the selected text.
To edit the sampled color or to choose your own, double-click the Fill color icon in the Tools panel and use the Color Picker to select another hue.
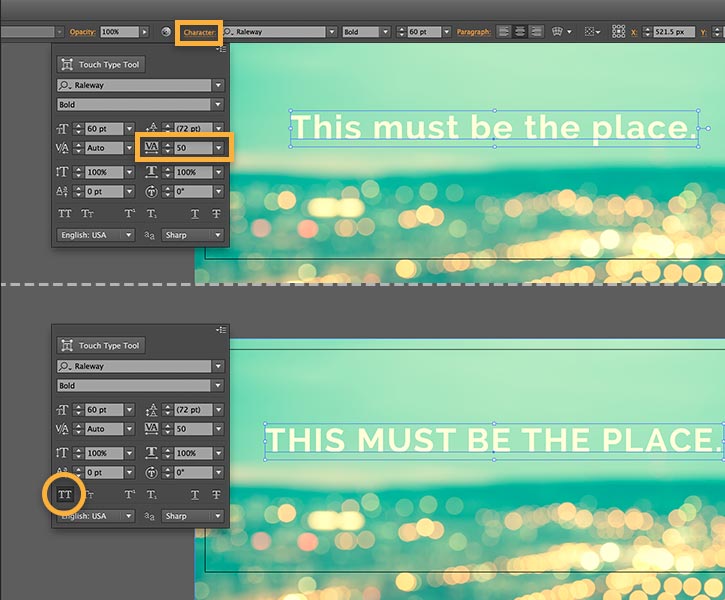
Try increasing spacing between letters to make the title appear airy and elegant, or apply negative spacing to give it an edgy, modern look.
Select the text with the Selection Tool and and click the Character Panel link in the Control panel.
Click the pull-down menu in the Set Tracking field, and then choose values such as 50, -25, -10, etc., to experiment.
Try setting the title in all caps. Click the All Caps icon to get another look in just one step.
In this step, you'll add an effect to make the title stand out more.
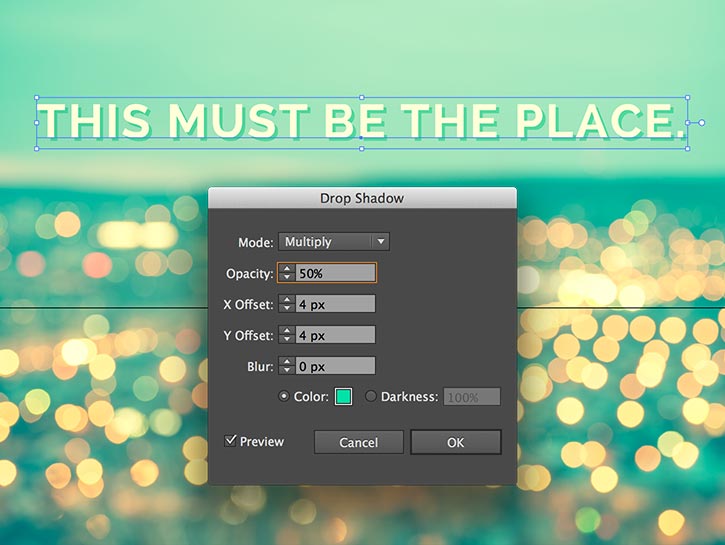
With the text selected, go to Effect > (Illustrator Effects) Stylize > Drop Shadow. Check Preview to view the effects dynamically. Experiment by changing the Mode, Opacity, Offset, Blur, and Color settings.
To create the hard-edged drop shadow shown, use these settings:
- Mode: Multiply
- Opacity: 50%
- Offset values: 4 px, 4 px
- Blur: 0 px
Click OK to apply the effect.
Finally, you'll save your title design in one of the web formats.
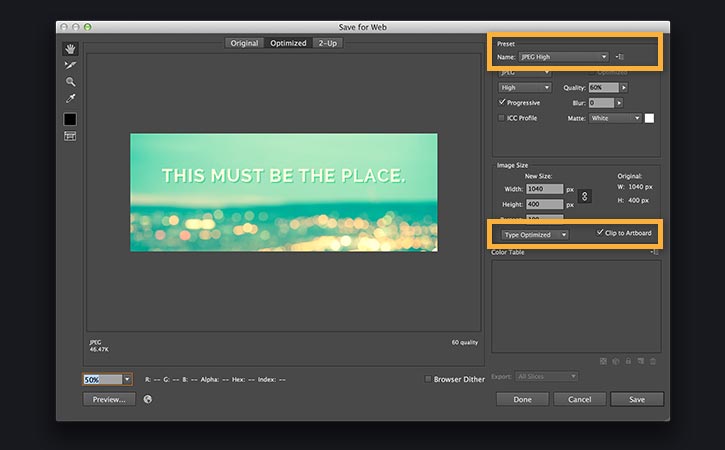
Go to File > Save for Web.
In the Preset menu, select the JPEG High option. Check Clip to Artboard—this option will fix the overhanging image pixels from the final file.
Optional: In the Anti-aliasing menu, click the pull-down menu and choose Type Optimized so your title displays with smooth edges.
Click Save.
* Nguồn: Illustrator CC
Ý KIẾN THÀNH VIÊN