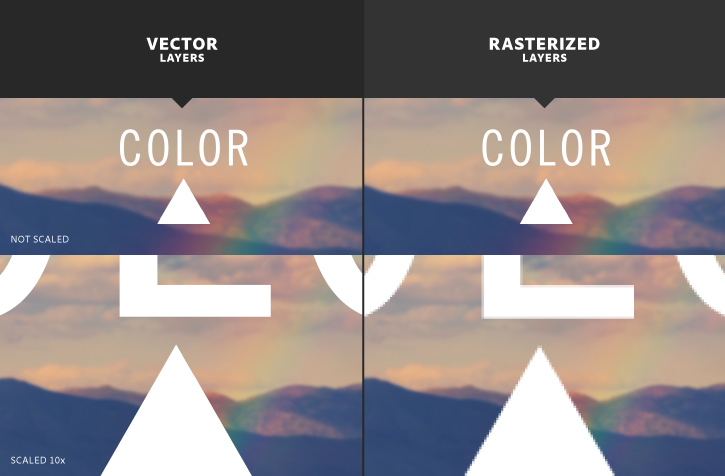
Photoshop graphic elements can be vector images or rasterized (bitmap) images.
When to rasterize your type and shape layers in Photoshop CC
Photoshop displays "This type / shape layer must be rasterized before proceeding. Rasterize the type / shape?" when you do a raster edit on a vector layer. Learn what this means and the suggested workarounds.


By default, shapes and text are created on a type of layer called a vector layer. No matter how much you zoom in on a vector layer, the edges always remain perfectly crisp.
When you rasterize a vector layer, Photoshop converts the layer to pixels.
You might not notice a change at first, but when you zoom in on a newly rasterized layer you will see that the edges are now made up of tiny squares, called pixels.

Certain tools like the brush tools, eraser, paint bucket fill, and filters only work on rasterized layers. In order to use one of these tools on a vector layer, the layer must first be converted to pixels.
Be aware: when you convert a vector layer to pixels, it loses its vector functionality, meaning:
- Shapes and text can no longer be scaled to any size without some loss of quality.
- Text is no longer editable, meaning you can not change the words or the font.

At a certain point in your project you might need to rasterize a vector layer to use the tool or get the edit that you want.
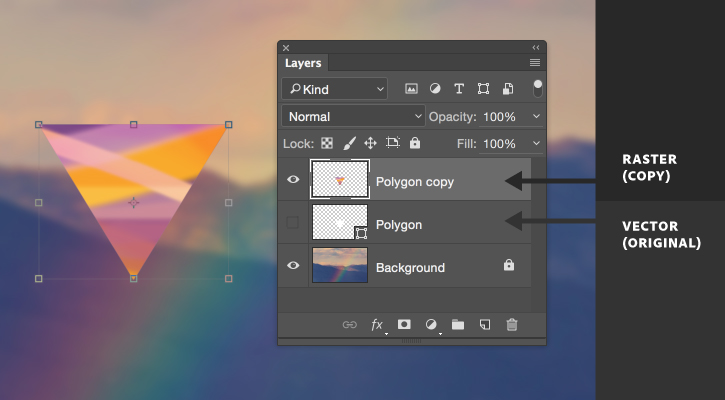
Before you rasterize a vector layer, always duplicate it by choosing Layer > Duplicate. Then, rasterize the copy.
This preserves the original vector layer if you need to go back and make changes later.

Instead of rasterizing to paint or draw directly on a vector layer, create an empty layer above the vector layer, then use any of the painting or drawing tools on the new layer.
Click the New Layer icon in the Layers panel and then use the Brush Tool to paint on the new layer.
Tip: To constrain the paint to the edges of the shape, first use the Magic Wand Tool to make a selection of the shape, then paint or draw inside the selection.

Instead of rasterizing to use the Paint Bucket Tool to change the fill color of a shape or text, change the fill directly from the vector tool's properties.
For shapes, select the vector layer in the Layers panel. Then, open the Properties panel (Window > Properties). Change the color using the color picker.
For text, double-click the T icon in the Layers panel to highlight all of the text. Then, open the Character panel (Window > Character). Change the color using the color picker.

Instead of rasterizing to use the Eraser Tool to hide parts of a vector layer, use a Layer Mask instead.
First, select the vector layer in the Layers Panel. Then, click the Layer Mask icon to add a layer mask to the vector object.
Now, use the Brush Tool to paint with black on the layer mask. Painting with black will conceal those parts of the layer. Painting with white will reveal those parts of the layer.
* Nguồn: Photoshop CC
Ý KIẾN THÀNH VIÊN